
Ceiling Water Stain After Painting: Bleed-Through or a New Leak?
Updated October 25, 2026
A returning brown mark and a visible repair outline need different responses. Separate moisture investigation, stain sealing and surface correction before repainting.
- Trusted since 2005
- Fully insured
- Dust-controlled sanding
- Paint-ready finishing
- 3-year workmanship warranty
Quick Answer
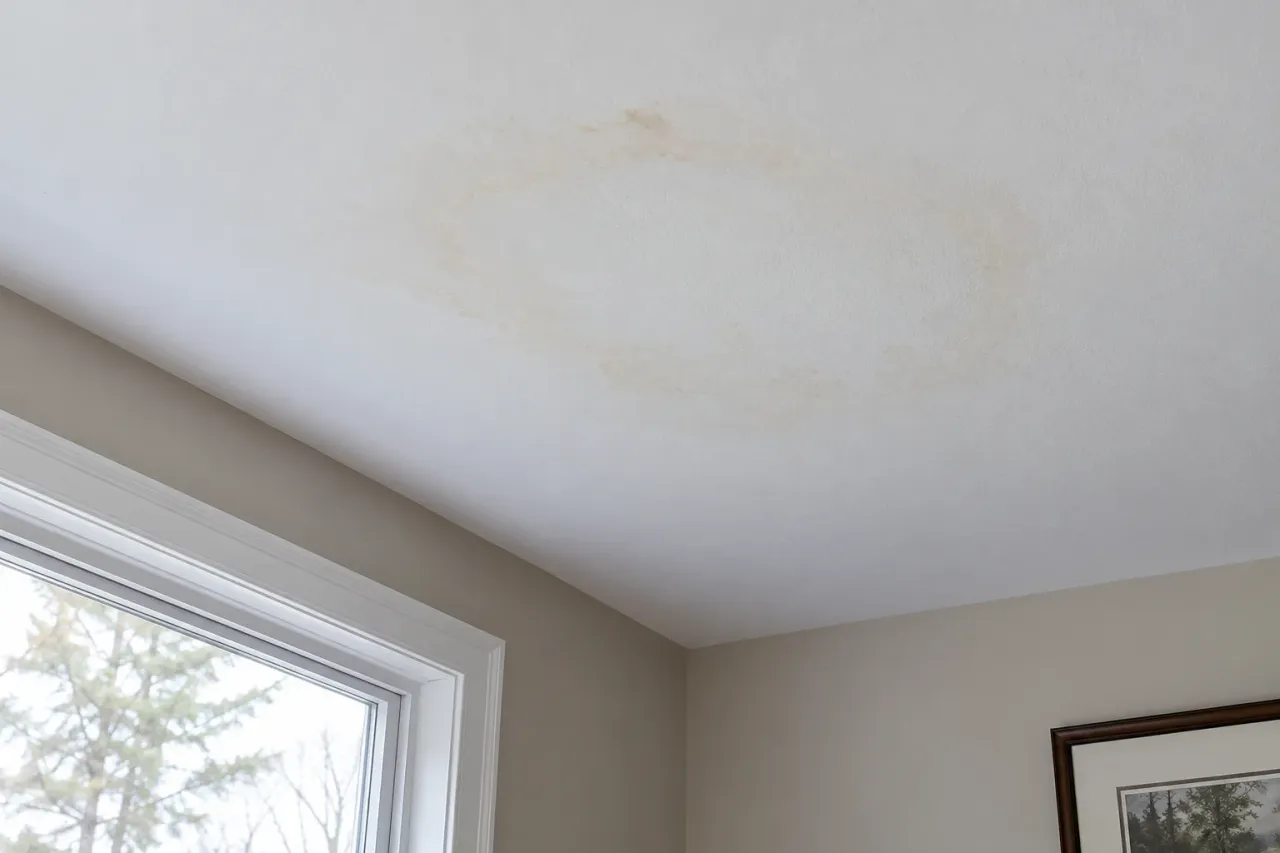
A ceiling water stain after painting can be residual discolouration bleeding through the coating, but renewed moisture must be ruled out first. A pale patch visible only at an angle may instead be a texture or sheen difference. Have the source and substrate assessed, repair any unsound drywall, then specify suitable stain-blocking preparation and a clear repainting boundary.
A ceiling water stain after painting does not automatically mean the painter used the wrong paint. It may mean moisture has returned, residual staining was not properly isolated, or the repair reflects light differently from the surrounding ceiling. The next step is to establish which problem you have before paying for another coat. Paint can cover a colour difference; it cannot resolve an active leak or strengthen damaged drywall.
EPF Pro Services approaches ceiling and drywall repair as part of a sequence: understand the cause, establish a sound surface, repair the finish and then decorate. This guide focuses on the frustrating return of a mark after painting. It helps you prepare useful observations and define the handoff between the person investigating the moisture, the drywall contractor and the painter.
Three different problems can look like a failed paint job
| What you notice | Possible explanation | Next discussion |
|---|---|---|
| Mark grows, changes or accompanies fresh bubbling | Renewed moisture or another unresolved condition | Source investigation before cosmetic work |
| Brown or yellow colour returns through otherwise intact paint | Residual stain bleed, once renewed moisture is ruled out | Compatible stain-blocking preparation |
| Pale or shiny patch changes with viewing angle | Porosity, sheen, texture or a raised repair edge | Surface correction and painting scope |
| Sagging, softness or material separation | Unsound ceiling material | Keep clear and obtain professional assessment |
These observations are clues, not a diagnosis. A stable-looking ring can still be associated with intermittent moisture, and two problems can exist together. For example, a repaired leak can leave both residual staining and a poorly feathered patch. Separating those issues helps avoid a second repair that addresses only one part of the result.
Start with a dated record, not another roller coat
Take a wide photo showing the room and a closer photo of the mark from a safe position. Record when it first appeared, when the ceiling was painted and when the mark returned. Note whether its outline changes or whether you only notice it under a particular light. Keep the original images so you can compare the same area without relying on memory.
Add the known history. Was a roof or plumbing repair completed? Was a damaged section removed, or was the ceiling simply sealed and painted? Do you know which primer and paint were used? An invoice or product label is more useful than a recollection that someone used good paint. Missing information is worth stating honestly rather than filling the gaps with assumptions.
If the area changes after rain or use of a fixture above, tell the relevant professional. That timing can help guide investigation, but it does not prove the source. Water may travel before appearing on a ceiling. Do not open the ceiling, touch wet electrical fittings or puncture a bulge to investigate. Keep clear of sagging material and arrange appropriate assistance.
Condo owners should include the building history
If the source may involve another unit or a shared system, notify property management and provide the dated observations. A decorating contractor cannot establish access or responsibility for another part of the building. Ask what information is available about the source repair and what further checks are needed before your ceiling is closed or painted again.
Confirm the moisture problem has actually been resolved
The first important handoff is from source repair to finish repair. A statement that a leak was fixed should describe what was addressed and whether further investigation or drying is needed. The drywall contractor needs enough information to know that cosmetic work is appropriate. A fresh white coating is not evidence that the area behind it is suitable for enclosure.
A surface can feel dry while another part of the assembly remains affected. Where the history or condition warrants it, a qualified professional should assess the extent and drying needs. There is no universal waiting period that makes every ceiling ready. The materials, duration of wetting, access and room conditions all affect the decision. Avoid treating a few dry days as a substitute for assessment.
Health Canada's guidance on indoor moisture and mould emphasizes correcting moisture sources and obtaining appropriate help for hidden or extensive concerns. Report musty odours, recurring dampness or suspected mould before scheduling decorative work. Stain-blocking primer is not a mould-remediation method, and painting over affected material does not address the underlying cause.
Decide whether the drywall can support another finish
Once the moisture issue is resolved, the remaining ceiling still needs a material assessment. A firm surface with residual discolouration may be suitable for preparation and sealing. Softened board, separated facing, sagging or failed joints can need repair or replacement. The boundary should follow sound material and support, not merely the edge of the visible brown ring.
An old patch adds another question. If the original repair was poorly supported or its tape has released, a new stain blocker will not make it durable. The contractor should examine the patch edge and surrounding surface before specifying paint. This is especially relevant when the returning mark includes a crack or a raised outline rather than colour alone.
Our guide to repairing water-damaged drywall covers the broader repair decision. For a mark returning after painting, ask the contractor to identify which material can stay, which defects need correction and what evidence supports that scope. You need a clear repair boundary, not automatic replacement of an entire ceiling or automatic approval to paint everything again.
If the surface is sound, investigate residual stain bleed
Water can leave discolouration in the materials it passes through. After the source is fixed and the surface is suitable, that residual colour may still show through an ordinary decorative coating. Applying more ceiling paint can temporarily reduce the contrast without providing the stain isolation the surface needs. This is why a returning ring can occur even when the original leak has been repaired.
The next specification should identify a primer intended for the stain and compatible with the substrate and finish coat. Ordinary drywall primer is primarily used to prepare a porous surface; it should not be assumed to block every water stain. Product suitability, preparation and recoat conditions matter. Have the contractor follow the selected manufacturer's instructions rather than rely on a generic claim that any primer will do.
Avoid choosing products solely by whether they are water-based or solvent-based. Different formulations have different intended uses and limitations. Odour, ventilation, occupied-room access and drying requirements also need to be considered. The practical question is whether the exact product is appropriate for this surface and staining problem, and how the room will be managed while it is used.
A trial area can help assess whether the specified preparation isolates the residual mark before the whole ceiling is decorated. It should happen only after the source and substrate questions are resolved. If discolouration continues, stop and reassess rather than repeatedly adding paint. The contractor may need to revisit coverage, compatibility, preparation or the original moisture assumption.
If the mark is pale, inspect texture and sheen instead
A repair can be the right colour yet remain visible because it absorbs paint differently or has a different surface texture. This is often called flashing. Window light may make the patch look dull from one direction and more reflective from another. A raised edge can also cast a subtle shadow that resembles a stain in a photograph.
Look at whether the mark retains a brown or yellow colour as you move around the room, or mainly changes with the viewing angle. That observation helps frame the discussion, but it does not replace moisture checks when there is a leak history. Avoid sanding or pressing a suspect area yourself. Let the contractor distinguish a coating difference from a physical defect.
The solution may involve improving the feathered repair, sealing the prepared surface and repainting a coherent area. A stronger stain blocker alone cannot flatten a ridge. Our guide to why drywall patches show through paint explains these surface and light effects in more detail. It is a useful companion when the remaining problem looks white or grey rather than brown.
Give the repair and the primer their own drying stages
After drywall repairs, new compound introduces another drying requirement even if the original water damage has been resolved. Filling, taping, smoothing, sanding and priming should proceed according to the materials and site conditions. A chemical set is not the same thing as every layer being ready for paint. Thick repairs and poorly ventilated rooms can complicate the sequence.
Ask the contractor to describe the inspection points between coats and before primer. The purpose is not to prescribe an arbitrary number of days; it is to avoid sealing a surface before it is ready. Sanding too early can damage the finish, while coating too soon can undermine the planned result. A realistic schedule leaves room for the actual condition of the repair.
The drywall repair drying-time guide explains why the visible working time and elapsed project time differ. Keep those finishing stages separate from any moisture-restoration work. A wall compound timetable cannot establish that a previously wet ceiling cavity is dry or that a source repair has been successful.
Send the repair history with your photos. Use our drywall repair quote form to share wide and close views, when the mark returned, source-repair details and any known primer or paint products. That helps us identify what needs assessment before another decorating visit.
Choose the repainting boundary before work begins
A small stain can lead to a larger paint area even when the drywall repair is local. Existing white ceiling paint changes with age, lighting and previous application. A fresh patch of the same nominal colour may remain noticeable because its sheen or roller texture differs. The quotation should explain whether the aim is a localized touch-up or a consistent finish across a defined ceiling section.
Natural stopping points matter. A separate room may be straightforward to repaint from wall to wall. An open living and dining area may share one continuous ceiling plane, making a small rectangular painted section obvious. Bulkheads and changes in level sometimes provide useful boundaries, but they should be discussed in the room rather than assumed from the floor plan.
EPF's interior painting services can be coordinated with the repair scope so preparation, stain isolation and final coating are assigned clearly. Flat ceiling paint can reduce reflection, but it cannot hide unsound board or an unfinished raised patch. Agree on the finish product, included surfaces and inspection expectations before furniture is moved and protection is installed.
Understand what changes the price of a returning stain
The diameter of the mark is only one part of the job. Access height, occupied-room protection, the condition of the existing repair, required visits and the repainting boundary all affect the scope. A small mark above a stair opening can require more setup than a wider accessible mark in an empty room. Photos should show the surrounding space as well as the stain.
Separate investigation and source repairs from drywall and painting costs. EPF can scope the finish work, but plumbing, roofing, electrical concerns or specialist remediation may belong with other professionals. A quote should say which prerequisites must be completed and what evidence or access is needed before finishing begins. This avoids paying for decorative work that has to be removed for an unresolved issue.
If preparation exposes more failed material, agree how the change will be documented before additional work proceeds. Ask for photographs, an explanation of the new boundary and a revised scope. A sensible contingency process is more useful than an open-ended promise to handle anything. It also lets you compare repair options based on the condition actually found.
Prepare the room and keep the handoff clear
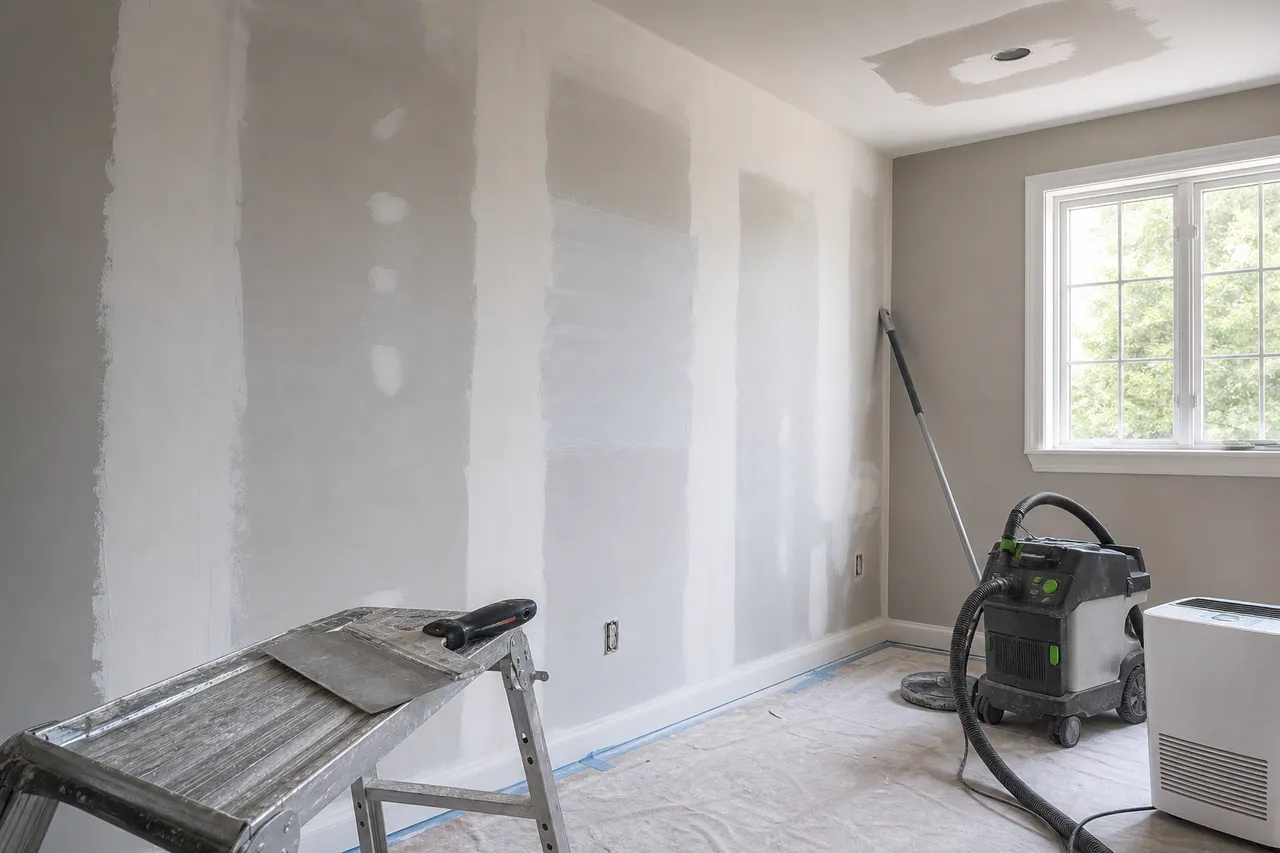
Clear movable furniture from beneath the work area and explain what must remain. Ceiling work needs protection beyond the exact repair footprint. Discuss floors, nearby walls, lighting and the route used to carry materials out. EPF uses HEPA-connected sanding equipment where appropriate to reduce ordinary finishing dust, with protection and cleanup suited to the room. No sanding renovation is completely dust-free.
For drywall repair in Mississauga and nearby service areas, tell us about occupied rooms, parking or condo access restrictions at the initial assessment. Those details affect scheduling and protection rather than proving anything about the stain itself. Include preferred dates, but leave room for the moisture and material checks that determine whether the ceiling is ready.
Before painting, confirm who accepts the repaired surface and who is responsible for stain-blocking preparation. If separate contractors are involved, avoid a vague handoff such as the ceiling is done. A more useful description states that the agreed repairs are complete, the surface is ready for the specified preparation, and any remaining exclusions have been recorded.
Review the result and retain the useful records
After the finish has reached the appropriate inspection stage, look at the ceiling in normal daylight and with the room's regular lighting. Review the original stain location, repair edges and the broader painted plane. Identify whether any remaining issue is colour, surface texture or a physical ridge. A specific description gives the contractor something concrete to evaluate and correct.
Keep the source-repair information, photographs and coating details together. If the mark changes again, that history helps distinguish a new event from an unresolved finishing issue. Do not assume every recurrence is covered by the same contractor's work or that a fresh coat is the automatic remedy. Report new dampness or changes promptly to the professional responsible for investigating the source.
For a useful first conversation with EPF Pro Services, send the room dimensions, ceiling height, close and wide photographs, the date of painting and what is known about the earlier leak. Explain whether you want a repair ready for your painter or coordinated repair and painting. Request a ceiling repair assessment so the next scope addresses the reason the mark returned, not just its appearance today.
FAQ
Does a returning brown ring always mean the leak is active?
No. Residual staining can bleed through paint, but renewed moisture must be ruled out before treating the problem as a coating failure.
Will another coat of ceiling paint stop the stain?
Not reliably. A sound, dry surface may need a suitable stain-blocking primer before finish paint. Paint cannot resolve an active source or damaged drywall.
Why does the repaired area look shiny instead of brown?
A sheen, porosity or texture difference can make a repair visible at an angle. A raised edge can also create a shadow. These require a surface assessment rather than stain treatment alone.
How long should I wait before repainting a water-damaged ceiling?
There is no universal wait. The source must be resolved, affected materials assessed and suitable for finishing, and new repair products ready for the next stage under their instructions.
Do I need to repaint the whole ceiling?
It depends on the existing finish and natural boundaries. A local repair may still need a larger paint area to avoid visible colour, sheen or roller-texture differences.
Drywall service pages and guides
Plan the Right Drywall Service Next
Planning illustrations
What the Work Can Look Like
Article Review
AuthorEPF Pro Services
Reviewed byEPF Pro Services
UpdatedOctober 25, 2026
Plan your drywall scope
Get a drywall quote today
Share photos, room sizes, and timing. We reply the same day with GTA drywall availability and a clearer written scope.
Quick next step