
Why Drywall Repairs Need Drying Time: From First Coat to Sanding, Primer and Paint
Updated July 19, 2026
A homeowner’s guide to setting, drying, sanding, priming, and realistic drywall finishing schedules in Ontario homes.
- Trusted since 2005
- Fully insured
- Dust-controlled sanding
- Paint-ready finishing
- 3-year workmanship warranty
Quick Answer
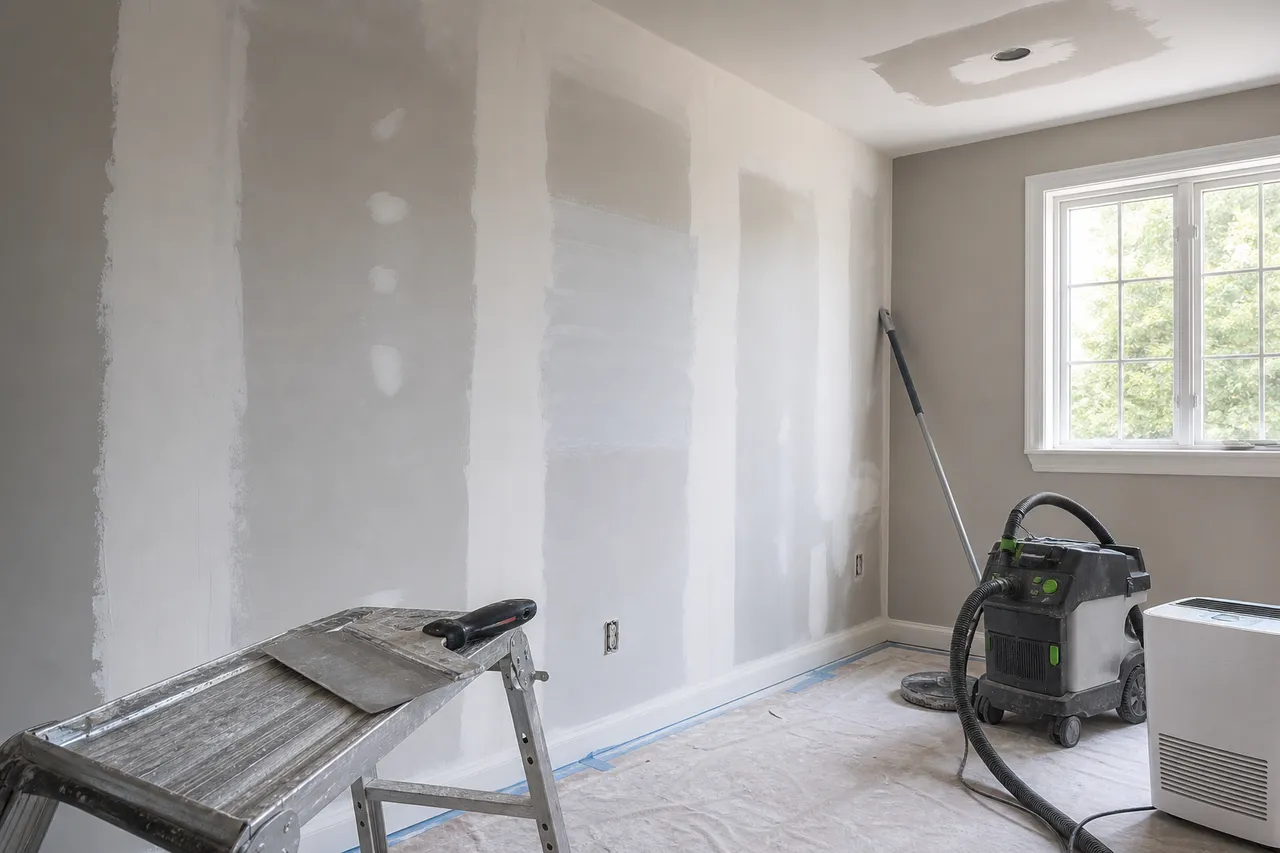
Drywall repair drying time can range from a few hours for a thin coat of setting compound in good conditions to 24 hours or longer for premixed compound, broad patches, taped joints, ceilings, or skim coats. Hardening is not the same as drying, and being ready for another coat is not automatically the same as being ready for sanding, primer, or paint.
Drywall repairs need drying time because the finish is built in stages. A coat must become stable enough to receive the next coat, dry enough to sand cleanly, and dry throughout before primer traps remaining moisture. A thin small patch in a warm, ventilated room may advance the same day when the material permits. A broad repair, taped ceiling joint, full-room finish, or popcorn-ceiling skim coat commonly needs overnight drying between important stages.
EPF’s drywall installation and finishing service treats drying as part of the finish system. For isolated damage, our drywall repair service connects the patch method to the same sanding, primer, and paint-readiness standards.
Quick drying-time ranges, not universal promises
| Work stage | Typical planning range | What can extend it |
|---|---|---|
| Thin setting-compound coat | Material-dependent working and set time; additional drying may still be needed | Thickness, cool surfaces, topping layers, and moisture trapped below |
| Premixed compound coat | Often about 24 hours in ordinary conditions | Humidity, low temperature, poor airflow, thick fill, and sealed rooms |
| Broad ceiling or skim coat | Often overnight or longer per significant coat | Uneven thickness, humid weather, ceilings, basements, and weak ventilation |
| Before sanding | When colour is uniform and compound is dry and firm throughout | Dark centres, softness, cool/damp feel, or clogging abrasive |
| Before primer and paint | After the final coat is fully dry, sanded, dust-free, and inspected | Deep fills, cool cavities, residual moisture, or required touch-ups |
These are planning ranges rather than guarantees. Product instructions, repair depth, substrate, room temperature, relative humidity, and airflow all matter. A contractor may use faster-setting material for an early structural fill and still return later because the broad finishing coat or surrounding substrate needs evaporation time before sanding and primer.
Setting, drying, and paint-ready mean different things
Setting-type compound hardens through a chemical reaction. Its bag time—such as a shorter or longer working window—describes how quickly the mixed material firms, not a promise that a thick patch is dry to its centre or ready to seal with paint. The surface can feel hard while moisture remains below or while a softer finishing compound placed over it is still drying.
Premixed joint compound dries mainly as water evaporates. It changes from darker grey to a lighter, more uniform colour, but colour alone is not the only test. Thick edges, deep fills, tape pockets, and cool ceiling areas can stay damp after the broad face appears pale. Sanding too early rolls or gouges compound and loads the abrasive instead of producing fine dry dust.
Ready for another coat means the previous layer can support the next pass without dragging, lifting, or trapping an unreasonable amount of moisture. Ready to sand means the final coat is dry and firm enough to refine. Paint-ready adds more requirements: the surface must be sanded, dust-free, checked under useful light, touched up if needed, and fully dry before primer.
Small patch, taped joint, and skim coat are different schedules
A shallow dent repaired with a thin coat has little water and a large exposed surface, so it can dry relatively quickly. A backed hole has a deeper first fill, taped perimeter, and wider finish coats. Even if the hole is small, the compound system may extend far beyond it. The schedule should reflect the deepest and slowest portion, not the first edge that turns white.
A taped joint is long and relies on consistent embedding. Applying the next coat over damp tape can disturb the bond or cause later shrinkage. Inside corners dry more slowly because air movement is limited and compound can collect at the angle. Butt joints need broad feathering, creating more total damp material even when every individual coat is thin.
A full skim coat is a surface-finishing operation across a wall or ceiling. It may be thin, but it covers a large area and can raise room humidity as water leaves the compound. Uneven substrates also create thicker pockets. The crew has to judge the slowest zones around seams, repairs, corners, bulkheads, and fixture openings before moving to sanding.
Why ceiling repairs may take longer
Ceilings often contain deeper damage around leaks, fixtures, fasteners, and old seams. Working overhead can also make it harder to keep every fill perfectly uniform. Compound at a recessed butt joint or damaged paper area may be thicker than the surrounding skim. That hidden thickness controls when the ceiling is actually ready.
Ceilings are also judged under demanding light. Windows produce raking daylight, while pot lights create repeating highlights. A rushed coat can shrink and reveal a joint after primer. Contractors may deliberately allow more time, sand, prime, then return for small touch-ups because primer reveals low spots and scratches that raw compound hides.
Warm air near a ceiling does not guarantee fast drying. If the whole room is humid, warm air may simply hold more moisture around a broad wet surface. Closed doors, covered vents, and containment required for dust control can also reduce natural exchange. Protection and drying therefore need to be planned together rather than treated as opposing goals.
Coat thickness controls more than the label on the bag
Water leaves compound from exposed surfaces. A thin feathered edge dries sooner than the centre of a deep fill. Doubling thickness can do more than double the practical wait because moisture has farther to travel. This is why multiple controlled coats usually outperform one heavy application: they shrink less, stay flatter, and make readiness easier to judge.
Deep holes should be rebuilt with board and backing rather than filled with a large mass of compound. Gaps and damaged edges may need an appropriate initial fill, but broad finish coats should remain controlled. A schedule gained by putting too much wet material in one pass is usually lost again through slow drying, cracking, shrinkage, or extra sanding.
Ontario humidity, heating, cooling, and airflow
GTA summers can bring high outdoor humidity. An open window may slow drying instead of helping. Air conditioning removes some moisture while cooling the space, but a very cold surface can also slow evaporation. A dehumidifier can help when sized and positioned appropriately. The goal is steady, moderate conditions—not blasting one wet spot.
Winter heating often creates drier indoor air, which can help evaporation, but cold exterior walls, garages, basements, and rooms with reduced heat still dry slowly. Very dry moving air can crust the surface of a thick coat while the centre remains damp. Contractors look at the whole repair rather than relying on a room thermostat alone.
Gentle air movement across the room is usually more useful than a fan aimed aggressively at one patch. HVAC supply and return paths should remain appropriate, and dust-producing work should not send contamination into the system. During wet finishing, balanced airflow helps carry moisture away. During sanding, containment and HEPA extraction become the priority.
Why forcing drywall mud to dry too fast causes problems
High heat directly on compound can cause uneven drying, edge cracking, excessive shrinkage, or a hard surface over a damp centre. Strong fans can dry the outer edges while leaving the middle behind. They may also blow dust or debris into fresh compound. Portable heaters introduce their own clearance and safety requirements and should never be improvised close to plastic protection.
The professional goal is predictable drying. Stable room temperature, reasonable humidity, gentle air exchange, thin coats, and enough elapsed time give better results than trying to rescue a heavy wet coat with extreme heat. If the schedule is fixed, the repair method and compound choice should be planned before work begins rather than forced afterward.
Send photos for a clearer scope
If a repair schedule affects painters, furniture, tenants, or another trade, send photos, room conditions, and your deadline so EPF can explain a realistic sequence Request an EPF drywall finishing quote.
Drying before another coat
Before recoating, the surface should be uniformly firm, without dark damp centres or material that moves under the knife. The next coat should glide over the previous layer rather than tearing it. Some setting compounds allow staged work sooner, but broad topping coats and adjacent premixed material still require judgment. Product instructions set minimums; job conditions decide the real schedule.
Recoating damp compound can trap moisture and create shrinkage lines later. It can also pull tape, create bubbles, and mix partially dried material into the next pass. On a repair that must disappear after paint, saving a few hours at this stage is rarely worth rebuilding the finish after primer exposes it.
Drying before sanding
Dry compound sands into a controlled fine powder. Damp compound smears, balls up, clogs mesh or paper, and tears at edges. If the abrasive loads immediately, that is a practical warning to stop. The surface should not feel cool and damp compared with the surrounding wall, though touch alone is not enough for deep fills.
Sanding should refine a flat coat, not compensate for one that was applied too heavily. Vacuum-assisted sanding connected to HEPA equipment helps capture dust, but it does not make wet material ready. After sanding, residual dust must be removed before primer so the sealer bonds to the repair rather than a loose powder layer.
Drying before primer and paint
Primer reduces the surface’s ability to release moisture. Applying it over damp compound can cause poor adhesion, soft spots, staining, flashing, or delayed shrinkage. The final coat must therefore be dry across both its face and thicker repair zones. The wall or ceiling is then sanded, cleaned, and inspected before primer.
Primer is also a quality-control stage. It gives the repaired and original surfaces a more consistent appearance, making scratches, pinholes, ridges, and low areas easier to see. A small touch-up after primer may need its own drying and spot-prime step. That is one reason a professional schedule sometimes includes a return between primer and finish paint.
Four realistic example schedules
| Project | Possible work sequence | Why it may extend |
|---|---|---|
| Small wall patch | Protect, support and patch; follow with finish coat, sanding, primer, and paint when dry | Deep opening, texture match, old paint, or humid room |
| Ceiling repair | Cut and board, tape and coat, return for finishing, then sand, prime, inspect, and paint | Leak history, broad feathering, raking light, or overhead thickness |
| Full-room drywall finishing | Tape and bed joints, successive wider coats, drying cycles, sanding, inspection, and primer | Many butt joints, corners, cool rooms, or high finish standard |
| Popcorn-ceiling skim coat | Prepare texture, repair substrate, skim in controlled passes, dry, sand with dust control, prime, touch up, and paint | Painted texture, hidden seams, broad area, humidity, or strong lighting |
These examples deliberately avoid promising an exact day count. Crew size, product selection, room access, finish level, and climate control change the result. The useful question is not “Can everything be done today?” but “What conditions must be met before the next finish stage?”
Signs the compound is not ready
Warning signs include darker patches, a cool damp feel, softness under light pressure, edges that roll under the knife, material that smears instead of powders, sanding media that clogs immediately, and a musty or unusually humid room. A hair dryer or heater should not be used to hide those signs.
When the centre remains dark much longer than the edges, the fill may be too thick or the substrate may be holding moisture. When only one location refuses to dry, investigate what is behind it. The problem may be a cold surface, plumbing leak, roof leak, condensation, wet insulation, or moisture entering through masonry rather than ordinary joint-compound behaviour.
When slow drying points to moisture behind drywall
Drywall compound should not be used to seal over an active moisture problem. Repeating stains, bubbling paint, soft board, swollen paper, mould-like growth, odour, or a repair that becomes damp again need the source addressed first. A plumbing, roofing, building-envelope, or qualified moisture professional may need to inspect before drywall is closed.
Once the source is repaired, the cavity and materials must be dry and sound. Damaged drywall may need removal rather than surface coating. Stain-blocking primer can control residual discoloration only after the area is dry; it does not repair weak board or stop a leak. If asbestos or mold is suspected, appropriate testing or remediation should happen before disturbance.
Final takeaway: drying time protects the finished surface
Drywall repair drying time is not idle time added to a project. It is what allows the repair to shrink, stabilize, sand cleanly, accept primer, and remain less visible after paint. Faster materials can improve sequencing when used correctly, but no product cancels coat thickness, room humidity, substrate moisture, or the need for inspection.
For related planning, see why drywall patches remain visible after paint and EPF’s guide to Level 4 versus Level 5 drywall finishing. To plan a repair or finishing schedule, send room photos and timing through the EPF quote form.
FAQ
How long does drywall repair take to dry?
A thin coat may be ready within hours when the material and conditions permit, while premixed compound, taped joints, broad ceiling repairs, and skim coats often need about 24 hours or longer. Thickness, humidity, temperature, and airflow control the real time.
Can drywall mud be sanded before it is fully dry?
No. Damp compound smears, tears, and clogs abrasives. Sand when the material is uniformly dry and firm and produces dry powder rather than rolling or smearing.
How long should drywall compound dry before primer?
Prime only after the final coat is dry throughout, sanded, dust-free, and inspected. Deep fills and humid rooms can remain damp after the surface changes colour.
Does hot mud still need drying time?
Yes. Setting compound hardens chemically, but set time is not always the same as complete drying or paint readiness, especially in thick repairs or when premixed finishing coats are applied over it.
Why is one drywall patch not drying?
Excessive thickness, cool surfaces, poor airflow, high humidity, or moisture behind the drywall can cause one spot to stay dark or soft. Repeating moisture signs should be investigated before finishing continues.
Drywall service pages and guides
Plan the Right Drywall Service Next
drywall installation and finishing
Primary service page receiving authority from this schedule guide.
drywall repair services
Contextual service link for isolated repairs.
why drywall patches show through paint
Related finish-quality guide.
Level 4 versus Level 5 drywall finishing
Related finishing-standard guide.
request a drywall finishing quote
Send photos and project schedule details.
Field Photos
What the Work Can Look Like
Article Review
AuthorEPF Pro Services
Reviewed byEPF Pro Services
UpdatedJuly 19, 2026
Plan your drywall scope
Get a drywall quote today
Share photos, room sizes, and timing. We reply the same day with GTA drywall availability and a clearer written scope.
Quick next step