
Bathroom Ceiling Repair in Burlington: Peeling, Tape and Patches
Updated October 18, 2026
A ceiling defect can start in the coating, joint or board. Learn what to photograph and what a complete bathroom ceiling repair should include.
- Trusted since 2005
- Fully insured
- Dust-controlled sanding
- Paint-ready finishing
- 3-year workmanship warranty
Quick Answer
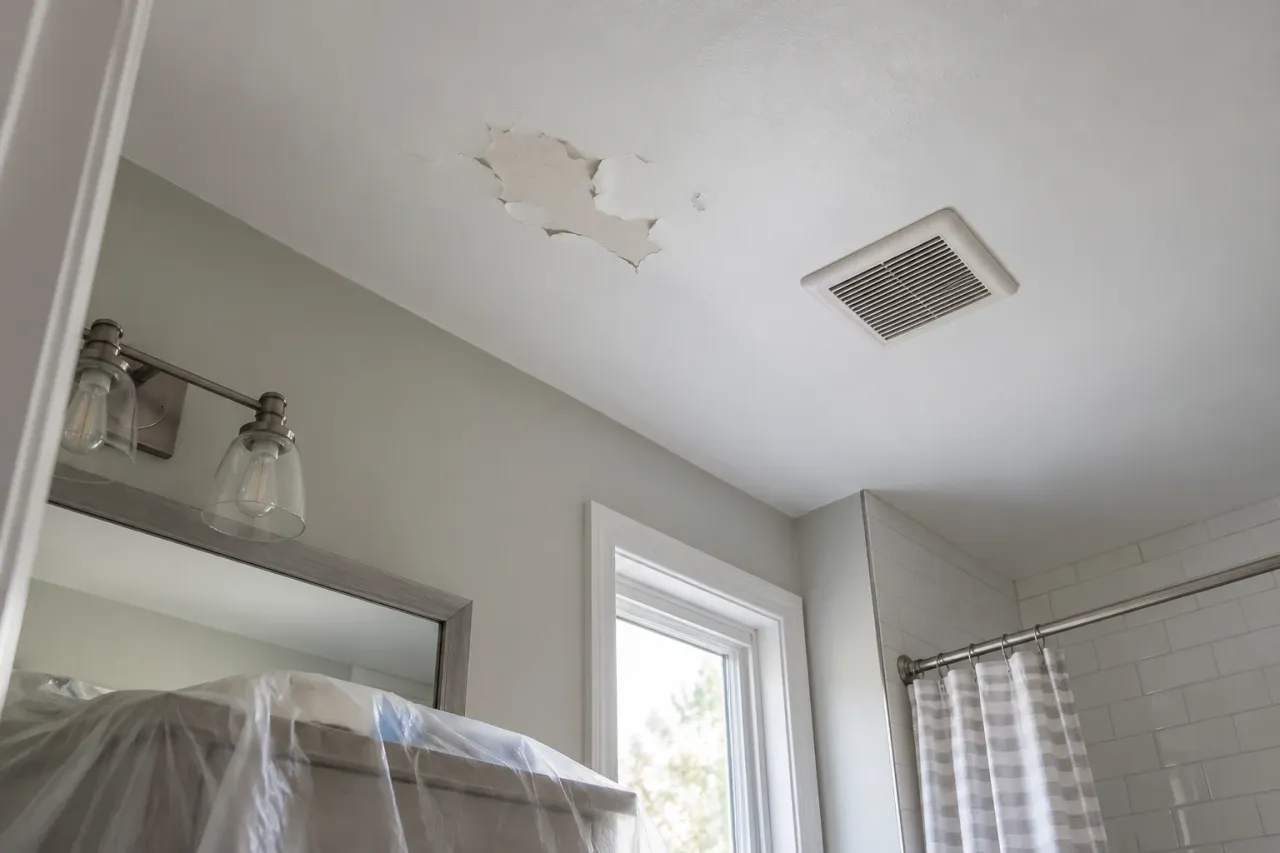
The repair depends on which layer has failed. Peeling paint may need coating preparation, loose tape needs a sound joint repair, and weakened drywall may need replacement. Investigate recurring moisture before refinishing, coordinate fan or light changes first, and agree whether the whole ceiling will be repainted.
Bathroom ceiling repair in Burlington should start by identifying what is failing: paint, the taped joint, the drywall facing or the board itself. These layers can look similar from the doorway, but they need different work. A new coat of paint may improve colour while leaving a loose seam or raised patch exactly where it was. The right quotation explains the defect before describing the finish.
EPF Pro Services provides drywall and ceiling repair with the preparation needed for a consistent painted surface. This guide focuses on bathroom ceilings rather than general wall damage. It helps you describe peeling, cracking and old patches, understand the limits of a cosmetic repair, and plan the room around investigation, finishing and return to normal use.
Identify the visible symptom before choosing a repair
| What you see | What needs checking | Scope to discuss |
|---|---|---|
| Thin paint flakes or peeling edges | Coating adhesion and moisture history | Prepare affected coating and repaint suitable sound substrate |
| A straight lifted strip or joint line | Tape bond and surrounding joint | Rebuild the failed joint before blending |
| A raised patch under side light | Surface shape and previous finishing | Feather or refinish the uneven area |
| Staining, softness or sagging | Source, material condition and extent | Professional assessment before reinstatement |
| A changed fan or light opening | Completed fixture work and support | Properly supported infill and finish around the final opening |
The table is a starting point for an estimate, not a diagnosis. A photograph can show where a mark appears but cannot establish what is happening above the ceiling. Tell the contractor when you first noticed it, whether it changes and whether the room has been repaired before. That history can be more useful than trying to name the material that has failed.
Peeling paint is a symptom, not a full explanation
A peeling finish can involve poor adhesion, an unsuitable or contaminated surface, moisture or earlier preparation that did not address a failing layer. Several factors can coexist. Before quoting a repaint, the contractor needs to understand the condition of the coating and the surface beneath it. A loose edge that continues beyond the visible patch may affect the preparation boundary.
Do not assume the answer is simply a stronger primer. Primer needs a suitable base and must be compatible with the substrate and finish coating. The condition should guide the preparation. Benjamin Moore's bathroom painting guidance is useful when discussing coatings intended for bathroom conditions; the selected product's instructions still govern its application and return-to-service requirements.
Ask the contractor what will be removed or stabilized before paint and how the repaired area will be made even with its surroundings. The answer should describe a result you can understand. If the proposal consists only of painting over a recurring defect, ask how the underlying condition has been assessed. A uniform colour is not the same thing as a durable prepared surface.
A loose tape line needs a joint repair
A narrow straight line can indicate a joint rather than isolated paint failure. If tape has separated, coating the surface does not restore its bond. The contractor should assess the failed area, the condition of the supporting board and the adjacent joint before deciding how much needs rebuilding. Repeating the same small surface patch over an unresolved joint can leave a persistent visible line.
A repaired joint requires enough finishing width to blend with the ceiling plane. The work area can be wider than the loose strip itself. This is particularly noticeable where a small bathroom window or vanity lighting sends light across the ceiling. Ask how the edge will be feathered and what repaint boundary is included instead of expecting the repair to stop exactly at the visible crack.
Report whether the line has returned after previous work. Explain when that repair was done if you know, what was included and whether other symptoms appeared. The contractor may need to distinguish a finishing defect from a condition that requires another professional's assessment. Do not treat every recurring line as proof of the same cause or assume every crack is only cosmetic.
Stains and softened board change the sequence
A ceiling stain should prompt questions about its history before a decorative solution is selected. Was there a known leak, who addressed it, and what information is available about the affected material? If the source remains uncertain, the repair estimate should identify that uncertainty. Finishing should follow readiness for reinstatement rather than becoming an attempt to conceal a problem that has not been resolved.
For dampness or suspected mould, Health Canada recommends addressing the moisture source and appropriate professional assessment where needed. This article does not provide a remediation procedure. Keep clear of unstable overhead material and obtain the relevant assessment before planning cosmetic work. Photos and a leak history help the professionals decide what information is missing.
A stain does not by itself establish that all ceiling board must be replaced, and dry-looking paint does not establish that everything can remain. The material and surrounding assembly need to be evaluated. If reconstruction is necessary, our guide to drywall reinstatement after a bathroom leak explains the handoff from investigation to a defined rebuilding scope.
Plan fan and light work before refinishing
A new fan or light can change the size or position of an opening. Have the responsible qualified trade settle the fixture and complete the relevant work before the ceiling is finished around it. The drywall contractor needs the final opening requirements, not an approximate description of a product that has not yet been selected. Late changes often mean another repair visit.
Discuss the visible trim as well as the opening behind it. An oversized cover is not a substitute for suitable backing where an infill is needed. The repair should work with the specified fixture and provide an appropriate finished edge. Keep access requirements in mind, and do not close an area that another trade still needs for completion or checking.
If ventilation appears ineffective, arrange assessment of the system rather than assuming the grille itself is the problem. The drywall scope can include repairs associated with agreed changes, but it should not quietly absorb an unresolved ventilation task. Identify who handles the system and who restores the surface so the final ceiling does not need to be reopened immediately.
Decide between local repair and broader refinishing
A sound ceiling with one localized defect may suit a focused repair. A ceiling covered in overlapping patches or uneven previous work may benefit from wider preparation. The choice depends on the condition, light and finish expectations. Ask the contractor to explain what would remain visible with a smaller scope and what additional work would achieve, rather than assuming more compound is always better.
A broad skim coat can help correct some surface irregularities, but it is not the answer to every ceiling problem. It needs a suitable stable base. It does not resolve an active leak, a detached layer or an unsuitable assembly. The proposed sequence should address those conditions first and explain why additional smoothing is appropriate for the final painted surface.
If the bathroom has old texture or uncertain material history, discuss assessment before disturbance. Do not scrape a trial patch merely to see what happens. Texture removal and smooth refinishing can be a separate scope from a small bathroom repair. Keep the material question distinct from the cosmetic decision so the work method is established before protection and scheduling are finalized.
Protection matters in a small bathroom
A compact room can be difficult to work in because the vanity, tub and toilet occupy much of the floor. Describe what will remain installed and what can be temporarily removed by the appropriate trade. The contractor needs suitable access for overhead work and enough room to control preparation. A small ceiling area does not necessarily mean a simple setup.
Confirm protection for the fixtures, floor, mirrors and route through the home. Move toiletries, towels and small belongings before work begins. Ask where materials and tools will be stored between visits, especially if the bathroom is still needed at other times. Clear responsibilities make it easier to maintain the agreed separation between a work area and household use.
Discuss dust-controlled sanding and cleanup in practical terms. Appropriate extraction helps manage sanding dust but does not eliminate every trace of renovation debris. Agree which surfaces will be cleaned, when protection comes down and when the room is released. A tidy work zone during the day and a room ready for ordinary use at completion are related but different expectations.
Drying and coating intervals belong in the schedule
A ceiling repair can require several stages even when the damaged area is small. Joint work, compound drying, sanding and primer checks may not happen in one visit. Conditions and product instructions govern when the next stage is appropriate. The quiet periods are part of the work sequence rather than evidence that the ceiling should already have been painted.
Our drywall repair drying guide explains why surface appearance alone should not decide when to coat. Ask the contractor what room conditions are needed during the work. Avoid planning shower use or another activity that conflicts with the product requirements simply because the crew is not physically in the room that afternoon.
For an only bathroom, agree on access before booking. The schedule should identify when the room is unavailable and when the completed coating is ready for its intended conditions. The drywall crew's final visit and the coating's return-to-service point may not be identical. Make household arrangements from the complete plan rather than an estimate of active labour hours alone.
Plan the repaint boundary and final appearance
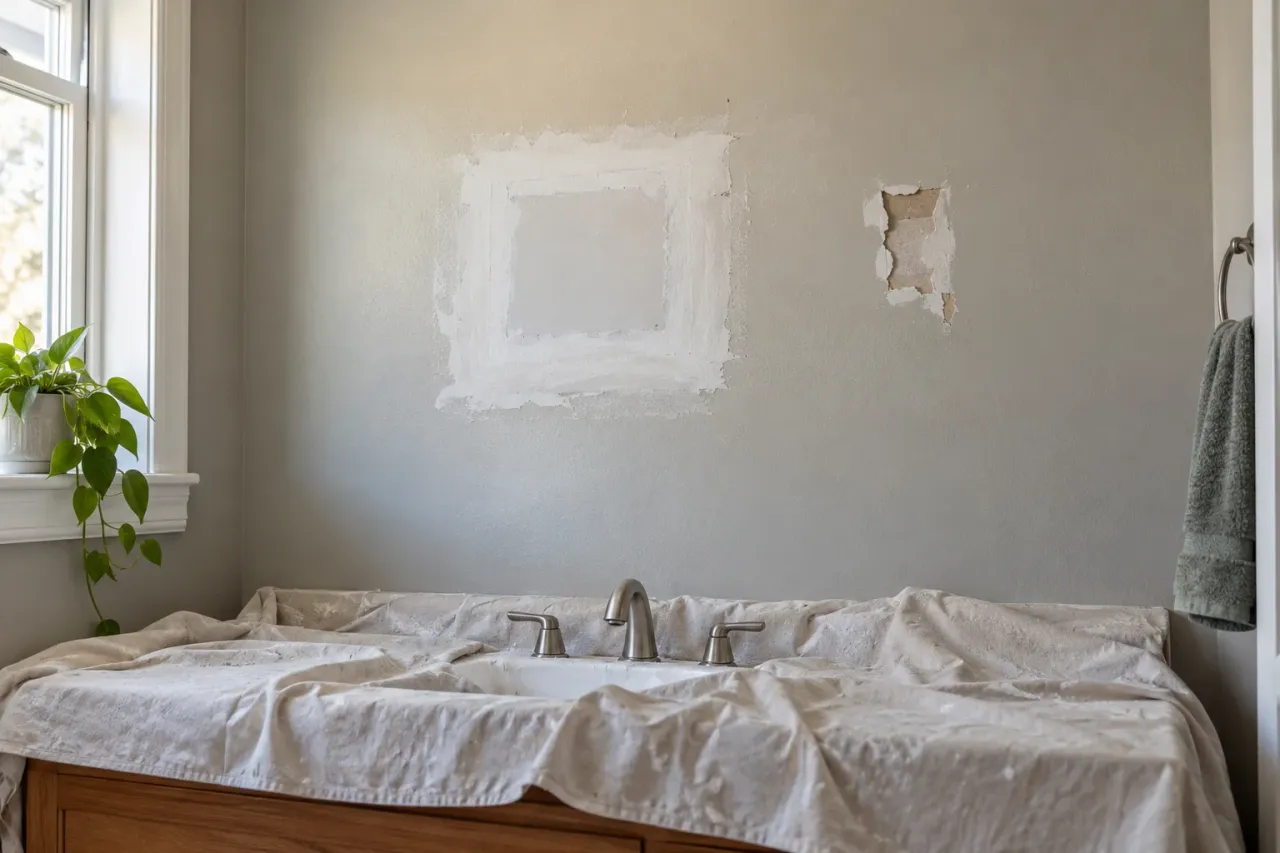
A repaired patch can be structurally sound yet look different from the surrounding ceiling. Differences in texture, sheen or absorption can remain visible after a local touch-up. Ask whether the quote includes painting the whole ceiling and what wall-edge preparation is included. This avoids a disagreement where the contractor prices a patch but the homeowner expects a uniform finished room.
Primer is part of a compatible coating system, not a promise to hide every irregularity. Inspect the surface after preparation and address visible edges before the final paint where practical. The guide to why patches show through paint explains the distinction between shape and finish. Knowing which issue is present prevents repeated coats from becoming the default response.
Discuss the final ceiling coating by product and suitability, not only sheen. Bathroom conditions matter, and manufacturers provide application and service guidance for their products. Agree on the appearance under normal room lighting. A low-reflection finish may be desirable, but its suitability and preparation still need to be confirmed for the actual room.
What to include in a Burlington repair estimate
For bathroom drywall and ceiling repair in Burlington, provide the ceiling dimensions, height and photographs from more than one angle. Describe the access route and retained fixtures. If the property is in a managed building, confirm its actual work arrangements. Do not assume that all buildings or neighbourhoods have the same requirements or that a contractor can infer them from the city alone.
The written scope should identify preparation, joint or board repair, smoothing where included, sanding, primer, painting and cleanup. It should name exclusions such as investigation, remediation or fixture work handled by others. If the ceiling needs replacement rather than surface repair, the drywall installation scope should describe the new backing and its connections to retained surfaces.
Ask how additional damage will be documented if preparation reveals a larger failed area. A useful change process explains the condition and revised price before extra work proceeds. This is more practical than either assuming nothing unexpected can happen or accepting an open-ended repair. Photographs and a clear boundary help both parties discuss the change in concrete terms.
Check the ceiling before closing out the job
At the final walkthrough, view the ceiling from the positions where it will normally be seen. Check the repair edges, light and fan openings, painted perimeter and overall consistency. Confirm that the agreed fixtures and surfaces have been cleaned and that any separate trade work is identified. The inspection should match the written scope rather than a new expectation introduced at the end.
Keep the coating name and useful repair notes. If a mark returns, record when it appears and whether anything else changed instead of immediately covering it again. A recurring symptom is information for the next assessment. Good records help distinguish a finish concern from a new or unresolved condition without pretending that one photograph can establish the cause.
To plan your project, request an EPF bathroom ceiling repair quote with wide photos, close-ups and the history you know. We can discuss which parts of the ceiling need repair, what must be resolved first and how the completed surface should look. The aim is a defined repair and finish, not simply a fresh coat over the same uncertainty.
FAQ
Can peeling bathroom ceiling paint just be painted over?
The loose coating and underlying condition need assessment first. A finish coat does not correct poor adhesion, detached tape or deteriorated board. The preparation should address the failed layer.
Does a ceiling stain always require new drywall?
No single stain establishes the scope. Confirm the source, material condition and readiness for repair. Some sound surfaces may be refinished; weakened or affected material can require replacement or other professional work.
Should a new fan be installed before ceiling repairs?
Coordinate the final fixture and relevant trade work before finishing its opening. The drywall scope can then suit the actual opening and avoid a second round of cutting and patching.
Will a small repair need the whole ceiling painted?
Often the repaint boundary is wider than the repair, but the decision depends on the existing coating and finish expectations. Agree the boundary in the quotation rather than assuming a local touch-up will blend.
Can repairs be made around a retained vanity and bathtub?
Often they can, provided there is suitable access and protection. Show the fixtures in your photos and ask whether anything needs removal before work starts. The quote should include the protection and cleanup required for the room.
Drywall service pages and guides
Plan the Right Drywall Service Next
Field Photos
Bathroom planning illustrations

Article Review
AuthorEPF Pro Services
Reviewed byEPF Pro Services
UpdatedOctober 18, 2026
Plan your drywall scope
Get a drywall quote today
Share photos, room sizes, and timing. We reply the same day with Burlington drywall availability and a clearer written scope.
Quick next step