
When Should Popcorn Ceiling Removal Happen During a Renovation?
Updated August 30, 2026
A contractor sequencing guide for coordinating popcorn removal, pot lights, ceiling repairs, painting, flooring, cabinets, trim, and final cleanup.
- Trusted since 2005
- Fully insured
- Dust-controlled sanding
- Paint-ready finishing
- 3-year workmanship warranty
Quick Answer
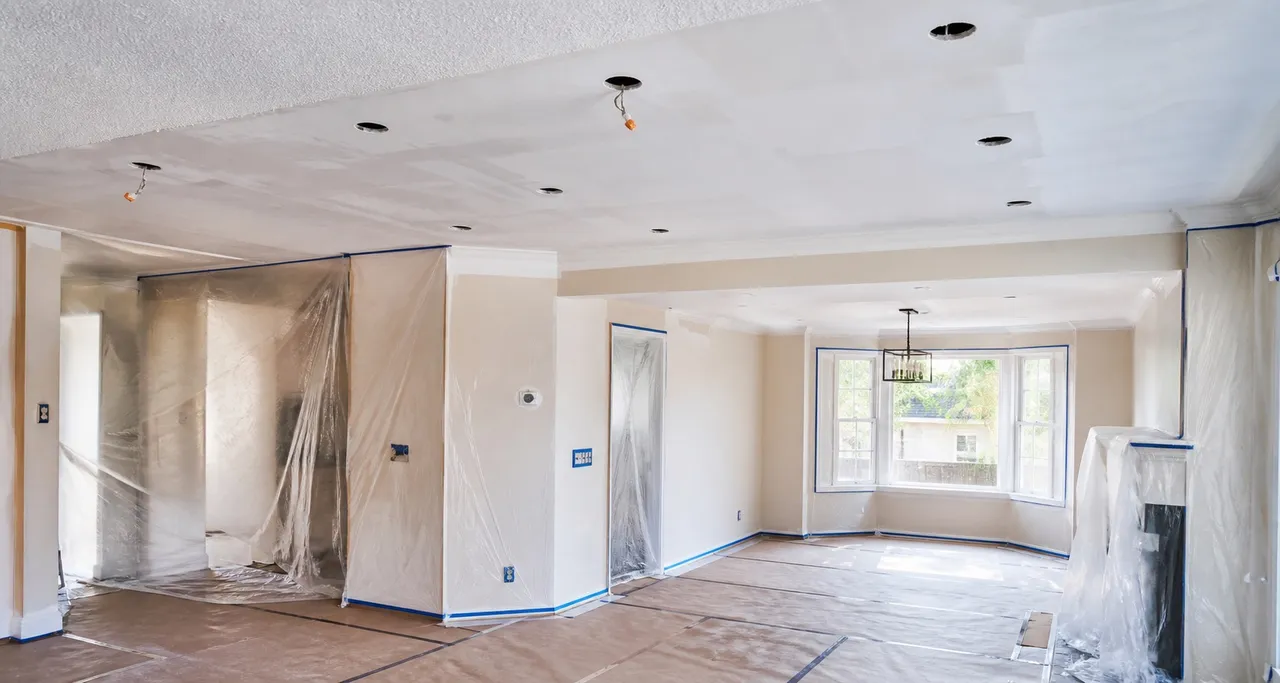
Popcorn ceiling removal should usually happen after the final lighting and ceiling layout are decided, but before final skim coating, wall painting, finished-floor refinishing, trim touch-ups, and final cleaning. Electricians can establish pot-light locations and complete necessary rough work first; the ceiling crew then repairs openings, smooths the full plane, primes, and paints. The exact order changes when cabinets, walls, floors, or occupied-home protection create different risks.
Popcorn ceiling removal is messy overhead work followed by precise finishing. In most renovations it belongs after destructive layout decisions and ceiling rough-ins, but before the surfaces most likely to be damaged by debris, sanding, ladders, masking, and paint. The best schedule is not simply ‘ceiling first.’ It is a handoff plan between the electrician, drywall finisher, painter, flooring crew, cabinet installer, and homeowner.
EPF’s popcorn ceiling removal service includes the refinishing stages that need to be protected from later trades. Planning those stages inside the full renovation schedule avoids paying to repair a ceiling that was completed too early.
Recommended renovation order at a glance
| Stage | Typical work | Why it comes here |
|---|---|---|
| 1. Investigation and decisions | Leaks, asbestos questions, layout, walls, cabinets, lighting, permits | Prevents disturbing unsafe material or finishing areas that will change |
| 2. Demolition and rough work | Wall openings, plumbing, HVAC, electrical routes and pot-light layout | Creates access holes before the final ceiling surface |
| 3. Ceiling removal and repair | Protection, texture method, patches, tape, skim coating and sanding | Contains overhead debris before delicate finishes |
| 4. Primer and ceiling paint | Inspection, touch-ups, primer, flat finish coats | Completes the overhead plane before final walls and floors |
| 5. Walls, trim, floors and fixtures | Wall paint, baseboards, floor finish, trims and device installation | Protects final details from heavy ceiling work |
| 6. Punch list and cleaning | Lighting check, touch-ups, trim installation and final clean | Finds interaction issues after all systems are visible |
Decide the final room layout before ceiling finishing
Wall removal, new bulkheads, cabinet changes, islands, fireplaces, and room divisions can all change where ceiling repairs and lights belong. A ceiling finished before those decisions may need new joints, patches, or transitions. Even if structural work is handled by other professionals, the ceiling contractor needs the final geometry before creating a continuous skim and paint system.
Ask where the natural stopping lines will be. An open living, dining, and kitchen ceiling may need to be treated as one plane. A beam, bulkhead, change in height, or doorway can divide the work. This affects protection, daily access, coat timing, and whether the whole area must remain out of service together.
Resolve leaks and material questions before demolition
Active or recent water problems come before decorative work. Repair the source, verify drying, and assess drywall strength. Soft or sagging board may need replacement. Unknown older texture may require testing before scraping, sanding, drilling, or cutting. A renovation schedule is not a reason to skip these gates; discovering them after other trades mobilize is more disruptive.
If staining is present, use the water-damaged popcorn ceiling decision guide to separate a finish repair from a moisture or drywall-replacement problem.
Pot lights: settle the layout before the final skim and paint
The final pot-light count, diameter, spacing, switching, and relationship to cabinets and furniture should be decided early. A licensed electrical contractor should handle electrical design and work as required. Ceiling openings or abandoned fixture locations can then be repaired before the finisher creates the final plane.
There are several workable handoffs. In one, the electrician marks and completes rough openings before ceiling removal, then removes or protects trims and returns after paint. In another, exploratory access and wiring happen first, the ceiling is refinished, and final holes are cut with a coordinated layout. The correct approach depends on the fixture system, access above, ceiling condition, and electrician’s method. What should be avoided is an unplanned series of new holes after final paint.
Recessed lights create critical light close to the surface. Patch rings, ridges, and joint buildup that looked minor under a temporary centre fixture may become obvious. The ceiling needs inspection with the planned lighting in mind, and final trims should meet the new plane cleanly. Electrical boxes, supports, clearances, and wiring must remain the electrician’s responsibility.
EPF already provides a location-specific planning resource for popcorn ceiling removal with pot lights in Mississauga. This article addresses the larger renovation sequence rather than repeating that installation guide.
Plumbing, HVAC, speakers, alarms, and ceiling access
Pot lights are not the only penetrations. Supply registers, return vents, bathroom fans, speakers, smoke and carbon-monoxide alarms, sprinkler components, attic hatches, and plumbing access can interrupt the ceiling. Confirm which items stay, move, or disappear. Patching an abandoned opening before the final skim is cleaner than adding a small repair after paint.
If mechanical or plumbing work requires access from below, complete that work and any inspections before permanent closing. A drywall patch needs backing, fastening, taping, coating, drying, sanding, primer, and paint. Compressing that into the end of the schedule because another trade arrived late usually shows in the finish.
Should popcorn removal happen before wall painting?
Usually yes. Texture debris, water, compound, sanding dust, primer, and ceiling paint can affect walls. The ceiling crew also needs to mask or protect wall surfaces and work at the wall-to-ceiling line. If the walls are already finished, more careful protection is possible, but it adds time and risk. Completing overhead work before final wall coats provides a cleaner sequence.
Wall repairs can happen before or alongside ceiling preparation when both surfaces are being refinished. The final painting sequence often puts the ceiling first, followed by walls and trim, so small ceiling splatter or cut-line work does not damage a completed wall finish. Exact handoffs depend on whether crown moulding remains and whether walls need major drywall work.
When the room is receiving a broader repaint, coordinate the ceiling scope with EPF’s interior painting service so primer, ceiling coats, wall repairs, wall paint, trim, and touch-ups form one written sequence.
Should ceiling work happen before new flooring?
If flooring is being replaced, heavy ceiling removal and sanding are generally easier before the finished floor is installed. The subfloor or old floor still needs protection, but the risk of damaging a brand-new surface is lower. Flooring crews also create dust, equipment traffic, and trim work, so the handoff must protect the new ceiling after it is complete.
When hardwood is being refinished rather than replaced, scheduling depends on contractor availability, cure times, and dust isolation. Ceiling work before the final floor finish is often practical, followed by a thorough clean and the flooring process. If floors are already finished, they can be fully protected for ceiling work, but the scope should account for seams, stairs, transitions, and clean access paths.
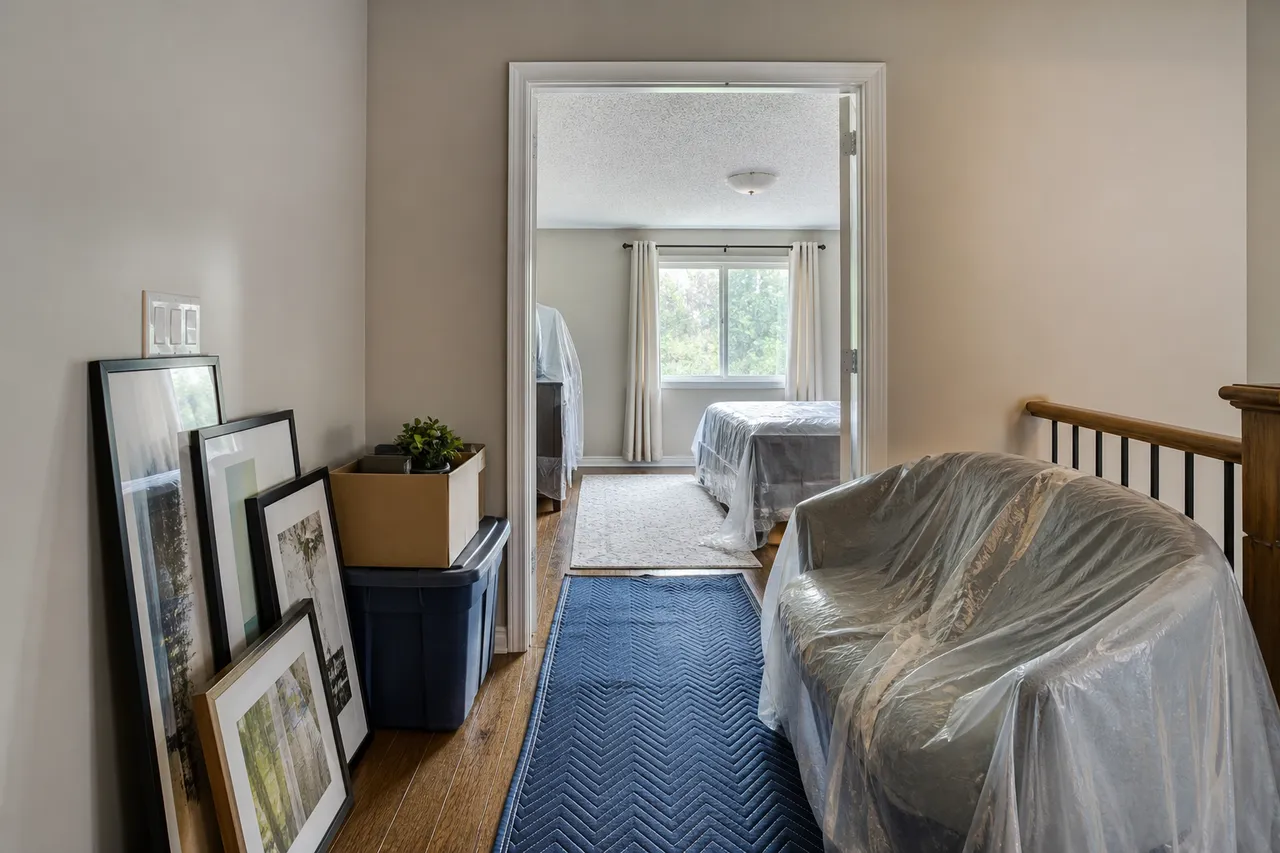
Do not assume plastic alone is adequate. Drop protection needs to resist wet debris, ladders, compound, and foot traffic without becoming slippery or allowing grit underneath. Occupied homes require daily access and edge management so protection itself does not become a trip hazard.
Cabinets and countertops change access
In a kitchen renovation, popcorn removal before new cabinets can simplify access to ceiling edges and reduce the risk to doors, panels, countertops, and appliances. But the final cabinet and lighting plan should already be known, especially for pendants, islands, bulkheads, crown, and tall cabinets that meet the ceiling.
If cabinets remain, they must be protected and the crew needs a practical way to reach ceiling edges without loading countertops. Grease or cooking residue on textured ceilings may also affect adhesion and preparation. The quote should state whether appliances stay, who moves them, and how open rooms connect to the work zone.
Crown moulding, baseboards, and finish trim
Existing crown moulding can sometimes remain if it is secure and the new finish can terminate cleanly. Removal may be preferable when it is changing, loose, or blocking repair at the perimeter. Installing new crown after the ceiling is finished avoids masking it during heavy work, but the installer and painter need to plan nail filling, caulk lines, and touch-ups without damaging the ceiling.
Baseboards are usually safer after the dusty overhead stages, especially if they are new and prefinished. If they already exist, protect them along with walls and floors. Door casings and trim paint belong late enough that equipment and containment do not scuff the final coat.
Painted popcorn can change the schedule
A schedule based on easy unpainted scraping can fail when paint has sealed the texture. Test areas may show slower removal, more torn paper, or a need to shift toward skim coating. That adds repairs, compound coats, drying, and sanding. Build contingency into the programme before flooring, movers, cleaners, or cabinet installers are booked immediately behind the ceiling crew.
The painted popcorn scrape, skim, or drywall comparison explains how the chosen method changes labour and downstream timing.
Drying time is part of sequencing, not idle time
Compound, primer, and paint need conditions that allow proper drying or curing. Coat thickness, humidity, temperature, air movement, and substrate affect timing. Other trades should not fill the room with dust, touch the ceiling, or change environmental conditions while finish coats are vulnerable. A tight schedule should reduce unnecessary gaps, not erase required material time.
If a crew promises a finish that skips directly from heavy repair to paint because another trade is arriving, ask what material and conditions make that sequence valid. Some setting compounds harden faster than premixed products, but set time and complete paint readiness are not identical in every application. Broad skim coats still need an honest moisture and surface check.
Occupied-home sequencing
An occupied house may be completed in zones. Bedrooms can be isolated while the main floor remains usable, or connected ceilings can be completed together to avoid visible boundaries. Furniture movement, kitchen access, pets, children, work-from-home needs, and overnight ventilation all matter. The fastest theoretical sequence is not always the safest or least disruptive one.
Daily cleanup and containment checks are part of the schedule. Vents may need protection during dusty stages and restoration before systems operate normally. Routes through the house should remain clean and protected. Homeowners should know which rooms are unavailable each day and when furniture can return without marking fresh paint.
Condo renovation sequencing
Condo work adds elevator bookings, loading windows, parking, hallway protection, building work hours, debris rules, and sometimes management approvals. Sprinklers, alarms, fan-coil components, and fire separations require appropriate coordination. A three-day interior scope can occupy more calendar time when access is limited to specific hours.
Confirm whether the unit will be empty, where materials can be staged, and whether water or ventilation restrictions apply. Do not schedule final cleaning or move-in for the same moment the last paint coat is applied. Allow time for inspection, touch-ups, trim reinstallation, and building-area cleanup.
Renovation sequence by project type
| Project | Preferred ceiling window | Main coordination risk |
|---|---|---|
| Pot-light upgrade only | After layout/rough work; before final trim and paint | New openings or patch rings after finishing |
| Full interior repaint | Before final wall and trim coats | Dust, splatter, and ceiling-edge work damaging new paint |
| New flooring | Usually before finished flooring, with both stages protected | Ladders, wet debris, grit, and later flooring dust |
| Kitchen renovation | After final layout; preferably before new cabinets and counters | Ceiling access around tall cabinets, pendants, and bulkheads |
| Wall removal/open concept | After structural/layout work and rough-ins | New ceiling patches and plane changes across the removed wall |
| Occupied condo | Planned around building access and room usability | Elevators, work hours, staging, ventilation, and final cleaning |
What can overlap—and what should remain separate
Room protection can often serve several compatible ceiling stages. Drywall repair and skim coating belong in one finish plan. Ceiling primer and paint can coordinate with whole-room painting. But active electrical work should not occur inside wet finish operations, floor finishing should not share uncontrolled dust with ceiling paint, and cabinets or delicate trim should not be installed while heavy overhead work continues.
The general contractor or homeowner managing trades should identify each handoff: who marks openings, who disconnects and reinstalls fixtures, who repairs access holes, who primes, who paints, who removes protection, and who performs the final lighting inspection. Unassigned tasks are where schedules and finishes usually break down.
Contractor field note: use the permanent lights for the punch list
A ceiling can pass under diffuse work lights and show a ridge when the recessed lights turn on. Coordinate a final check after trims and bulbs are installed but while touch-up access remains practical. This is another reason lighting rough-in belongs before finishing and final fixture activation belongs before the project is fully demobilized.
Local planning and priority EPF pages
Oakville and Burlington projects often combine bright open rooms with pot-light changes. Mississauga homeowners may be coordinating condos, full repaints, or flooring. Hamilton and Stoney Creek renovations can include several connected ceiling planes and older repairs. Grimsby work may be scheduled with main-floor modernization or drywall repair. None of those conditions should be reduced to a city-swapped timeline; the room and trade sequence control the real plan.
Review the relevant local service page: Oakville popcorn ceiling removal, Burlington popcorn ceiling removal, Mississauga popcorn ceiling removal, Hamilton popcorn ceiling removal, Stoney Creek ceiling removal, or Grimsby smooth-ceiling service.
Details to send before the schedule is built
Send room photos, dimensions, ceiling height, a simple plan showing connected spaces, and close-ups of texture, cracks, stains, fixtures, vents, crown, bulkheads, and cabinet tops. State whether the texture is painted, whether safety testing is relevant, and whether the home will be occupied. Include the planned start dates for electrical, plumbing, HVAC, cabinets, painting, flooring, and move-in.
For lighting, include the proposed fixture count and size plus the electrician’s intended rough-in and trim dates. For flooring, identify whether it is staying, being replaced, or refinished. For painting, state whether EPF is completing ceilings only or walls and trim as well. A calendar without scope details is not a reliable sequence.
Use the EPF quote form to send renovation photos and trade dates. The written scope should name responsibilities, protection, ceiling method, repair allowance, finish stages, drying assumptions, fixture handoffs, cleanup, and the point when the room is released to the next trade.
Final recommendation
Make ceiling decisions after the room layout and lighting plan are real. Complete leak correction, required testing, demolition, and rough access first. Then remove or prepare the popcorn, repair the substrate, skim, sand, prime, inspect, and paint before delicate final wall, trim, floor, cabinet, and cleaning stages. A coordinated handoff costs less than cutting into a finished ceiling and trying to hide the repair under new pot lights.
FAQ
Should pot lights be installed before or after popcorn ceiling removal?
Set the final layout and complete necessary electrical rough work before the final skim and paint. Exact cutting and trim handoffs should be coordinated between the licensed electrician and ceiling finisher.
Should popcorn ceiling removal happen before painting walls?
Usually yes. Removal, compound, sanding, primer, and ceiling paint can affect walls, so final wall and trim coats are generally safer afterward.
Should popcorn ceiling removal happen before new flooring?
Usually it is easier before finished flooring is installed or refinished. Existing floors still need robust protection, and the flooring stage must then protect the completed ceiling.
Can popcorn ceiling removal happen after kitchen cabinets are installed?
Yes, with careful protection and access planning, but doing it before new cabinets and countertops is often simpler once the final kitchen and lighting layout is known.
How much time should be left between skim coating and painting?
Enough for each coat to dry fully under the actual thickness, temperature, humidity, and airflow. Broad or deep repairs may need longer than a tight renovation calendar assumes.
Who repairs holes made for pot-light wiring?
The contract should assign that responsibility clearly. Electrical work belongs to the appropriate electrical trade; drywall patching and final ceiling finishing can then be coordinated with EPF.
Related local pages and guides
Keep Planning Your Project
popcorn ceiling removal service
Primary pillar page receiving authority.
interior painting service
Adjacent service used for sequencing walls, trim, and ceiling paint.
popcorn ceiling removal with pot lights
Related local planning guide.
painted popcorn ceiling method comparison
Related method and timeline guide.
Hamilton popcorn ceiling removal
Priority city page.
Stoney Creek popcorn ceiling removal
Priority local money page.
Grimsby popcorn ceiling removal
Priority local money page.
request a coordinated ceiling quote
Photo and trade-schedule CTA.
Field Photos
What the Work Can Look Like
Article Review
AuthorAlex - EPF Pro Services
Reviewed byEPF Pro Services
UpdatedAugust 30, 2026
Ready to plan your ceilings?
Get a popcorn ceiling quote today
Share photos, ceiling heights, and timing. We reply the same day with Mississauga, Oakville, and GTA availability.
Quick next step