What Happens After Popcorn Ceiling Removal? Repairs, Smoothing, and Paint Prep
2026-04-07
A homeowner guide to what happens after popcorn ceiling removal, including repairs, smoothing work, sanding, paint prep, cleanup, and when the room is really ready again.
Many homeowners think the job is basically over once the popcorn texture is off the ceiling. That is the point where the room looks most different, so it makes sense that people focus on it. But in most projects, the most important part still comes next. The ceiling has to be checked, corrected, smoothed, prepared for paint, painted properly, and cleaned up so the final result actually looks finished.
This is where expectations often split. A homeowner may be happy that the old texture is gone, while the contractor is looking at seams, rough spots, old repairs, stains, or uneven areas that now need attention before the room is ready for flat paint. That difference in perspective is exactly why post-removal guidance matters.
If you want the full service overview first, start with our popcorn ceiling removal page. It explains how the work moves from old texture to a clean finished ceiling.
This guide focuses on the stage after the texture comes down: what the crew is looking for, why the ceiling may still look rough at first, what cleanup really means, and when the room is genuinely ready to go back into normal use.
Why the ceiling often looks unfinished right after removal
Old texture hides a lot. It can hide patch marks, hairline movement, uneven seams, old water spots, rough repairs, and small differences across the field of the ceiling. Once the popcorn is removed, those issues become more visible because the ceiling no longer has a rough coating hiding them.
That is why the ceiling may look worse for a short period right after removal. Homeowners sometimes worry at that stage because they expected the room to look nearly finished right away. In reality, the project is moving normally. The old texture is gone, and now the underlying surface can finally be corrected properly.
This is also why homeowners should compare contractors by the finished ceiling, not only by how quickly they get the texture off. Removal creates access to the real work. It does not replace it.
The first step after the texture comes down
The first post-removal step is usually a surface check. The ceiling is reviewed for torn areas, cracks, rough spots, old patching, uneven seams, stains, and areas that may need broader correction. This stage matters because it sets the plan for everything that follows.
Some ceilings need only minor touch-ups. Others reveal enough problems that a broader smoothing approach becomes the right path. What homeowners should understand is that this is not a detour. It is part of the normal sequence that leads to a clean flat ceiling instead of a ceiling that merely no longer has texture.
Repairs after popcorn ceiling removal
Repairs are one of the most common post-removal stages. Once the old texture is gone, crews often have to deal with prior patching, small seam movement, dents, minor gouges, old fixture marks, or rough areas left behind by earlier work. Some of these issues were there before. Others become easier to see only after the ceiling is opened up visually.
This is one reason homeowners should not judge the project too early. A ceiling can look uneven right after removal and still turn out well, because the repair stage has not happened yet. In fact, the better the inspection is at this point, the better the final result usually becomes.
Repairs also affect timing. A room with very few underlying issues may move steadily into the next stage. A room with visible old patches or broader unevenness may need more correction before it is ready for sanding and paint prep.
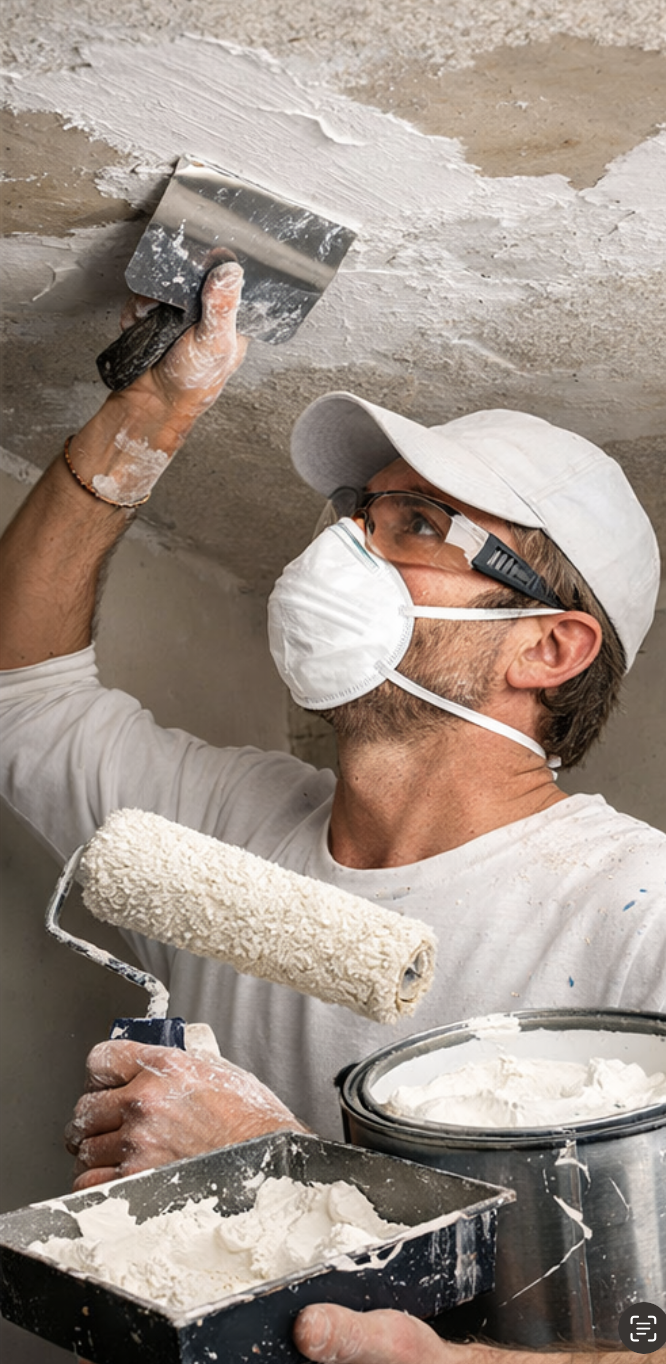
Smoothing work is what changes the look of the ceiling
After obvious repairs are addressed, the next big stage is smoothing the ceiling so it reads more evenly across the whole room. This is the stage that turns an old textured ceiling into something that can eventually look clean, simple, and modern.
Homeowners sometimes expect a perfect surface immediately after texture removal, but the ceiling usually needs this broader correction first. The purpose is not only to hide repair spots. It is to make the field of the ceiling feel consistent again so the final paint does not highlight every old flaw that the texture used to hide.
This is one of the clearest reasons a popcorn ceiling project is more than a scrape job. The final look comes from the smoothing and blending that happens after the old finish is disturbed.
Sanding and surface refinement
Once the ceiling has been corrected, sanding helps reduce roughness, soften transitions, and prepare the surface for paint. Homeowners sometimes think sanding is only a cleanup step. It is more important than that. It helps the field read flatter and more even once the room is painted and lit normally.
This stage also explains why cleanup does not end the moment the old texture is bagged up. There is still fine surface work happening after removal, and the room needs to stay controlled until that phase is complete. A ceiling that is rushed through sanding often shows it later.
Paint prep after popcorn ceiling removal
Before flat ceiling paint goes on, the surface still needs final prep. That means checking for remaining rough spots, confirming the repairs have blended properly, making sure dust has been managed, and preparing the ceiling so the paint reads cleanly and evenly.
This part of the process matters because ceiling paint does not hide finish problems the way many homeowners hope it will. Paint can make a room look fresher, but it will still reflect the quality of the surface underneath. If the ceiling is not ready before paint, the finished room rarely looks as clean as expected.
That is why the question after removal is never just what colour goes on next. The real question is whether the ceiling is ready for paint at all.
Flat ceiling paint and the final look
Flat ceiling paint is usually the stage homeowners have been waiting for because it makes the room feel finished again. But it works best when the earlier steps were done carefully. A good paint stage highlights the quality of the preparation underneath. A rushed paint stage does the opposite and can make unevenness stand out more clearly once the room is back in use.
This is why post-removal work should be thought of as part of the result, not a side detail. Removal changes the ceiling. Paint reveals whether the ceiling was actually finished well afterward.
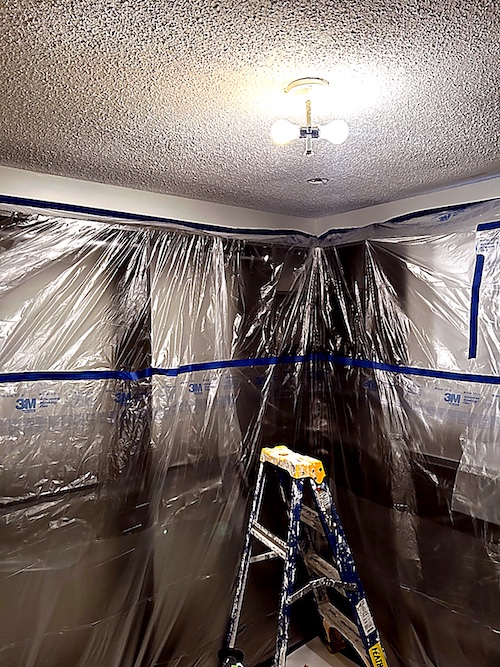
Cleanup after popcorn ceiling removal is not only debris pickup
A lot of homeowners search cleanup after popcorn ceiling removal because they are trying to understand how messy the project stays after the main workday. The key point is that cleanup happens in layers. There is the obvious cleanup of old texture and room debris, and then there is the later cleanup that happens after sanding, checks, touch-ups, and paint stages are complete.
That is why a room may look partly cleaned and still not be ready to reopen fully. Final cleanup means more than removing waste. It means the work zone has passed through the finish stages and the room is ready to be handed back without active dust-producing work still ahead.
When the room is really ready again
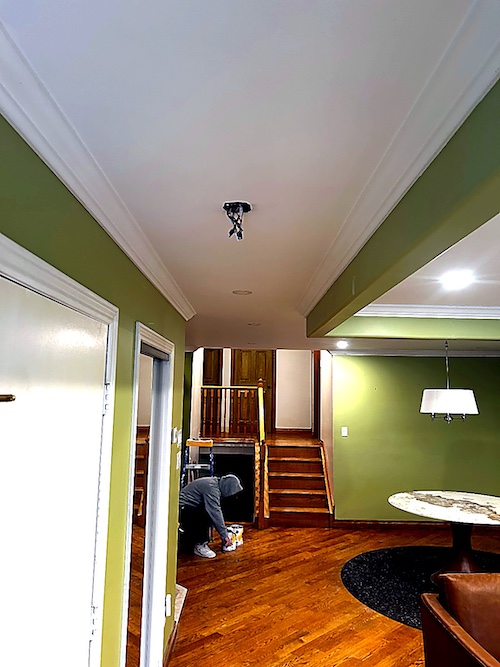
Homeowners often want to know when furniture can come back, when the room can be slept in again, or when the space is ready for guests. The honest answer is that the room is ready when the finish sequence is complete, not just when the texture is gone. That usually means repairs are done, smoothing is complete, sanding and final prep are finished, paint has been applied, and the cleanup is complete enough that the room can return to normal use comfortably.
This is important because a room can seem close to done halfway through the process. The safest assumption is that the room returns to normal after the finish stages are complete, not after the first dramatic visual change.
Painted ceilings often need more post-removal work
If the old popcorn texture had already been painted, the post-removal stage often becomes more important and more involved. Painted ceilings are more likely to need broader correction afterward because the removal stage is usually less clean and less forgiving.
That does not mean the room cannot end up looking excellent. It means homeowners should expect the finish stages to carry more of the project. The real quality often comes from how the surface is recovered after the texture is disturbed, not from the removal stage by itself.
If that sounds like your ceiling, our painted popcorn ceiling removal guide is the best follow-up.
What homeowners usually get wrong about the post-removal stage
The first mistake is assuming the room should look perfect immediately after scraping. The second is thinking repairs mean something went wrong, when in reality repairs are often part of the normal project sequence. The third is expecting paint to hide what was not corrected earlier. And the fourth is bringing furniture or decor back too early because the biggest visual change has already happened.
A better mindset is to treat popcorn ceiling removal like a series of stages that build toward the final result. Old texture comes off first. Then the surface is corrected. Then the ceiling is prepared and painted. Then the room is handed back cleanly.
How to prepare for the post-removal phase
If you are planning your room now, think beyond removal day. Leave enough time for the later stages. Avoid moving furniture back in too quickly. Keep expectations focused on the finished ceiling rather than the first dramatic change. That makes the whole project feel more predictable.
If you are still preparing the room itself, read how to prepare for popcorn ceiling removal. Good preparation makes the post-removal stages cleaner and easier to manage.
What a strong final walkthrough should cover
By the time the room is ready for final review, the homeowner should be looking at the full result, not just the absence of texture. The ceiling should read consistently, the room should be cleaned back to a usable state, and the sequence of repairs, smoothing, paint prep, and paint should make sense in the finished appearance.
The best walkthroughs feel calm because the earlier stages were explained properly. Homeowners know why the ceiling looked rough for a short period, what was corrected, and why the final room now looks the way it does.
FAQ
Why does the ceiling still look rough after popcorn removal? Because the old texture often hides flaws, and the repair and smoothing stages still come after removal.
Do most ceilings need repairs after popcorn removal? Many do. Small cracks, old patching, rough spots, and uneven seams are common once the texture is gone.
Is sanding part of the normal process after removal? Yes. Sanding usually helps refine the surface and prepare it for paint.
Does cleanup happen only at the end? Cleanup happens throughout the project, but final cleanup usually comes after the finish stages are complete.
When can furniture go back into the room? Usually after the ceiling is finished, painted, and the room is cleaned well enough for normal use again.
What if the ceiling was painted before? Painted ceilings often need more post-removal correction because the texture usually does not come down as cleanly.
Does paint fix ceiling flaws by itself? No. Paint shows the quality of the surface underneath, so the earlier stages still matter.
Final thought
The real project starts after the old popcorn texture is gone. That is the stage where the ceiling is turned from exposed and uneven into something clean, smooth, and ready to live under again.
EPF Pro Services approaches popcorn ceiling projects as full finish jobs, not just texture-removal jobs, so homeowners understand what comes after removal and why it matters.
FAQ
Why does the ceiling still look rough after popcorn ceiling removal?
Because old texture often hides flaws. Repairs, smoothing, sanding, and paint prep usually still come after the visible texture is removed.
Do ceilings usually need repairs after popcorn removal?
Many do. Old patching, cracks, rough spots, and uneven seams often show up once the texture is gone.
Is sanding a normal part of the process after removal?
Yes. Sanding usually helps refine the surface and prepare the ceiling for a cleaner paint finish.
When is the room actually ready to use again?
Usually after repairs, smoothing, sanding, paint prep, paint, and final cleanup are complete.
What happens if the popcorn ceiling had already been painted?
Painted ceilings often need more post-removal correction because the texture usually comes down less cleanly.
Does flat ceiling paint hide surface issues by itself?
No. Paint reflects the quality of the surface underneath, so earlier correction and prep still matter.
Field photos
Inspiration for your project
Popcorn ceiling terms this page covers
Useful terms to compare removal, skim coating, and finish scope before you book.
- what happens after popcorn ceiling removal
- cleanup after popcorn ceiling removal
- ceiling repairs after popcorn removal
- paint prep after popcorn ceiling removal
- smooth ceiling after popcorn removal
- painted popcorn ceiling removal
- prepare for popcorn ceiling removal
- popcorn ceiling removal finishing steps
Ready to plan your ceilings?
Get a popcorn ceiling quote today
Share photos, ceiling heights, and timing. We reply the same day with Mississauga, Oakville, and GTA availability.
• HEPA dust control and Level 5 skim finishing
• Pot-light coordination and interior painting add-ons
• Flexible scheduling for condos and single-family homes
Quick next step
Send photos and room sizes through the main quote page, or call for a same-day reply.
Keeping the form on the main quote page helps this article stay lighter and faster.