Taking Off Popcorn Ceiling: How the Process Actually Works
2026-03-27
Taking off popcorn ceiling texture is not just scraping. Here is the real order of work, what changes on painted ceilings, and how to get to a smooth final finish.
If you are researching taking off popcorn ceiling, the biggest misconception is that the job is only about scraping. In reality, scraping is just one step. Room prep, testing, repairs, and final smoothing are what decide whether the ceiling looks updated or still looks patched after paint.
For the full service overview, start with our main popcorn ceiling removal page.
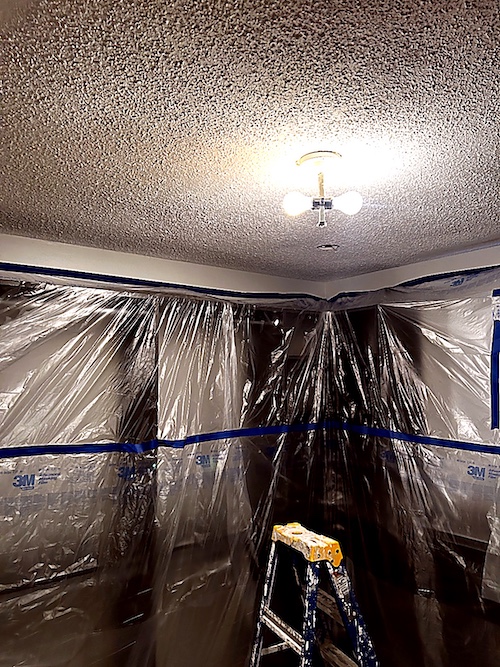
Step 1: protect the room before anything touches the ceiling
Taking off popcorn ceiling creates falling debris, wet material, sanding dust, and a surprising amount of cleanup if the room is not prepared properly. Floors, furniture, vents, fixtures, and walkways should all be protected before the first test patch starts.
If a contractor talks only about scraping and not about protecting the room, that is a warning sign. Ceiling work gets messy fast when prep is weak.
Step 2: test the ceiling instead of assuming the method
Not every popcorn ceiling comes off the same way. Unpainted popcorn can sometimes soften and scrape cleanly. Painted popcorn often does not. Some ceilings also hide cracks, old patches, or water marks that change the plan right away.
A proper test section tells you whether the popcorn will scrape off safely, whether the ceiling underneath is likely to tear, and whether full skim coating will be needed afterward.
Step 3: choose scraping, skim coating, or a mix of both
For lighter unpainted texture, careful scraping can be the fastest route. For painted or stubborn ceilings, the better path is often skim coating. Sometimes the best answer is a mix: scrape what comes off cleanly, then smooth the whole ceiling.
If your texture has paint on it, read Painted Popcorn Ceiling Removal: Scrape or Skim Coat? next.
Step 4: repair the ceiling underneath, not just the texture
Once the popcorn is off, the real ceiling shows up. That may mean seam lines, patched openings, torn areas, corner cracks, or low spots that the old popcorn was hiding. Those issues have to be fixed before anyone talks about a smooth ceiling.
This is where cheap removal quotes usually fall apart. Removal only is not the same as a ceiling that is ready for paint.
If you want the bigger picture on why homeowners make this update in the first place, read Why Remove a Stucco Ceiling?.
Step 5: skim coat and sand to the finish level you actually want
Homeowners often say they want the popcorn gone, but what they usually want is a clean, flat ceiling under normal room lighting. That means the final finish matters. In many living rooms, kitchens, hallways, and open-concept spaces, a Level 5 finish is the safer choice.
For that comparison, read Level 4 vs Level 5 Finish After Popcorn Ceiling Removal.
Step 6: prime before you judge the ceiling
A ceiling can look fine before sealing and then show every problem once the first coat goes on. That is why experienced crews check it carefully and do touch-ups after sanding, not just before.
What changes the timeline?
The timeline depends on whether the popcorn is painted, how much repair work shows up underneath, ceiling height, room lighting, and whether painting is included in the job. Simple ceilings can move quickly. Painted ceilings with old repairs usually take longer.
Where homeowners usually underestimate the job
Most homeowners underestimate three things: how much prep is needed, how often painted ceilings refuse to scrape cleanly, and how important full-ceiling smoothing is after the texture is gone. Taking off popcorn ceiling sounds simple in one sentence and is much harder to do well in a real home.
Bottom line
Taking off popcorn ceiling is really a process of room prep, testing, removal, repairs, smoothing, and getting the ceiling ready for paint. If you want the ceiling to look flat and finished instead of just “scraped,” the method and the finish need to be clear from the start.
To move from research to scope, go back to popcorn ceiling removal, or review local pages like Mississauga popcorn ceiling removal and Burlington popcorn ceiling removal.
Related local pages
Main popcorn ceiling removal page — Main service page for popcorn ceiling removal, smooth ceilings, and Level 5 finishing.
Why remove a stucco ceiling — A simple homeowner guide to the main benefits of replacing old texture with a smooth ceiling.
Painted popcorn: scrape or skim coat — Explains how painted ceilings change the removal method.
Level 4 vs Level 5 finish after popcorn removal — Finish-level guide for smooth ceiling results after texture removal.
Mississauga popcorn ceiling removal — Local service page for popcorn ceiling removal and smooth ceiling finishing.
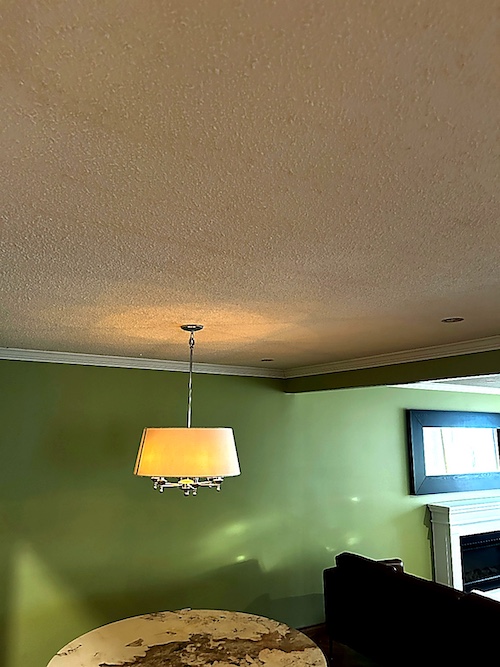
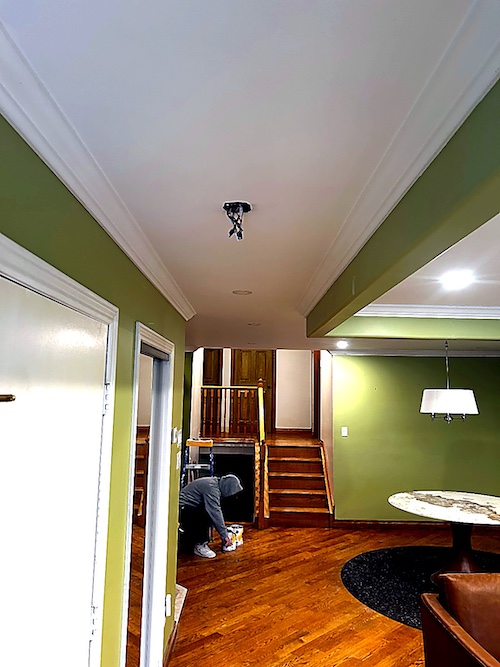
Field photos
Inspiration for your project


Popcorn ceiling terms this page covers
Useful terms to compare removal, skim coating, and finish scope before you book.
- taking off popcorn ceiling
- how to take off popcorn ceiling
- popcorn ceiling removal process
- taking off popcorn ceiling texture
- scrape popcorn ceiling or skim coat
- smooth ceiling after popcorn removal
- GTA popcorn ceiling removal process
Ready to plan your ceilings?
Get a popcorn ceiling quote today
Share photos, ceiling heights, and timing. We reply the same day with Mississauga, Oakville, and GTA availability.
• HEPA dust control and Level 5 skim finishing
• Pot-light coordination and interior painting add-ons
• Flexible scheduling for condos and single-family homes
Quick next step
Send photos and room sizes through the main quote page, or call for a same-day reply.
Keeping the form on the main quote page helps this article stay lighter and faster.