
Why Skim Coating Matters After Popcorn Ceiling Removal in Mississauga
Updated May 19, 2026
Mississauga guide to skim coating after popcorn ceiling removal, including why scraping alone is rarely enough for a clean smooth ceiling finish.
- Trusted since 2005
- Fully insured
- Dust-controlled sanding
- Paint-ready finishing
- 3-year workmanship warranty
Quick Answer
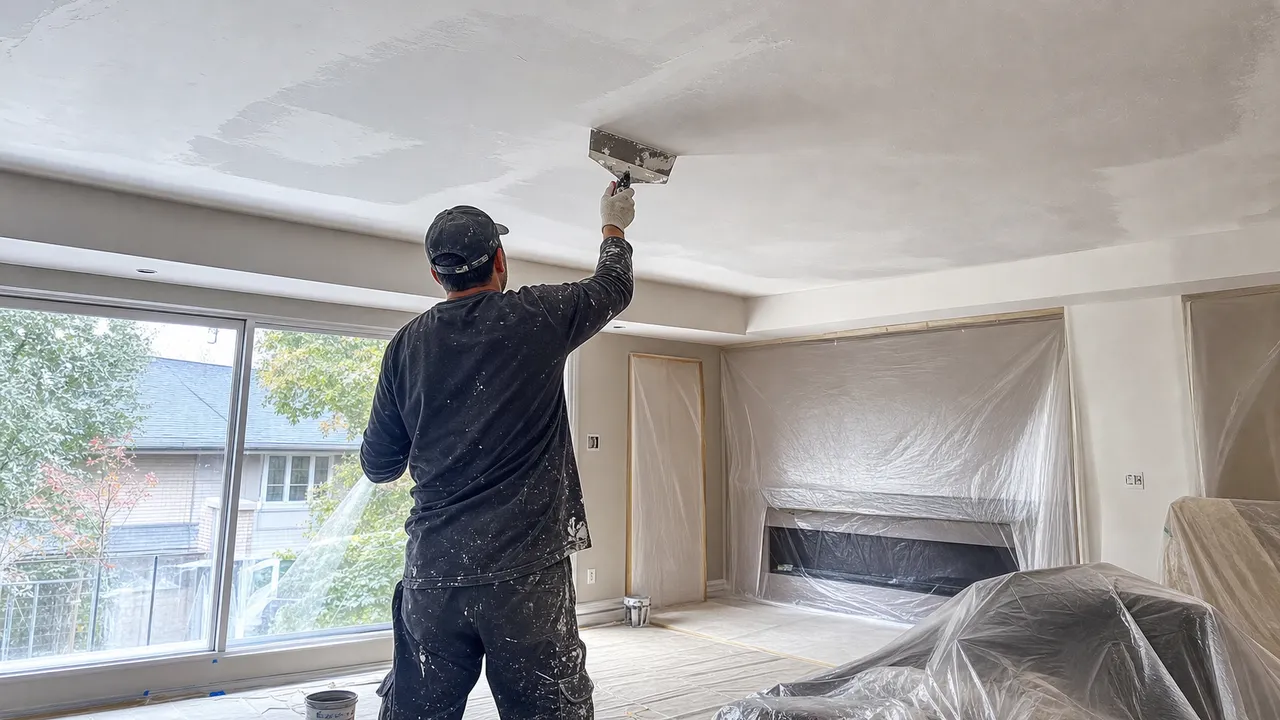
Skim coating matters after popcorn ceiling removal in Mississauga because scraping removes texture, but it does not automatically create a smooth ceiling. The finish usually depends on repair, skim coating, dust-controlled sanding, primer, and flat ceiling paint.
Short answer: skim coating matters after popcorn ceiling removal in Mississauga because scraping removes texture, but it does not automatically create a smooth ceiling. Once the popcorn comes off, the drywall may show seams, gouges, paper tears, old patches, stains, nail pops, and uneven areas. Skim coating helps flatten and unify the ceiling before sanding, primer, and flat ceiling paint.
If you are pricing the full result, start with popcorn ceiling removal and the Mississauga popcorn ceiling removal service page. This guide explains why the finish stage matters so much.
Quick answer for Mississauga homeowners
Skim coating after popcorn ceiling removal in Mississauga is usually needed when the exposed ceiling is not flat enough to paint directly. It is especially important on painted popcorn, ceilings with old repairs, rooms with pot lights, bright condo spaces, main-floor living areas, and homes where the homeowner wants a modern smooth finish rather than a ceiling that simply has less texture.
| Situation | What it usually means | Quote item to confirm |
|---|---|---|
| Clean unpainted removal | May need spot repairs and light skim work if the drywall is in good shape. | Confirm whether full or partial skim coating is included. |
| Painted popcorn removal | Often leaves rougher areas, paper tears, or stubborn texture shadows. | Confirm full skim coat, sanding, primer, and touch-up process. |
| Pot lights or strong daylight | Small defects become more visible after paint. | Confirm Level 5-style finish and light checks. |
| Old patches, stains, or seams | Removal exposes hidden repair problems. | Confirm drywall repair before skim coating. |
Removal is not the same as refinishing
Homeowners often ask for popcorn removal when what they really want is a finished smooth ceiling. Those are related, but not the same. Removal is the texture stage. Refinishing is the repair, skim coat, sanding, primer, and paint stage. If the quote only covers removal, the ceiling may still look rough when the texture is gone.
This distinction matters most when comparing prices. A cheaper quote may be cheaper because it stops earlier. A more complete quote may include the steps that make the ceiling look finished. Before choosing a contractor, ask whether the quote is for scraping only, scraping plus spot repairs, or a full smooth-ceiling finish.
What skim coating actually does
Skim coating applies thin layers of joint compound across the ceiling to even out the surface. It can fill shallow lows, cover torn paper after sealing, blend old patches, soften texture shadows, and create a more uniform plane. It is not simply spreading mud everywhere. Good skim coating is controlled, thin, and sanded carefully so the ceiling stays flat instead of wavy.
The ceiling is harder than a wall because it is overhead, wide, and exposed to light from many angles. Small ridges that would disappear on a wall can become obvious above a living room or kitchen. That is why skim coating needs patience, drying time, proper sanding, and a primer check before final paint.
When a full skim coat is worth it
A full skim coat is often worth it when the ceiling is painted popcorn, damaged during removal, full of old patches, crossed by seams, or located in a room with strong light. It is also common when the homeowner wants a higher-end smooth ceiling finish in main living areas. Bedrooms with soft light may sometimes need less work, but the decision should be based on the ceiling condition, not a generic package.
In Mississauga condos and open-concept main floors, full skim coating is often the safer path because natural light and pot lights reveal flaws quickly. If the ceiling is part of a larger renovation with new floors, fresh paint, or modern lighting, a thin finish stage can make the whole room feel unfinished.
Level 4 vs Level 5 after popcorn removal
Level 4 can be acceptable in some softer-light situations where the ceiling is already in good shape. Level 5-style finishing adds a broader skim coat to reduce visible differences across the whole plane. For smooth ceilings, especially under pot lights or large windows, Level 5 is often the safer recommendation.
The choice is not about using fancy language. It is about what the ceiling will look like after primer and paint. If the room has harsh light, flat paint, or long sightlines, a basic finish can show patch edges and sanding marks. A better skim coat gives the paint a more even surface.
For the full comparison, read Level 4 vs Level 5 finish after popcorn ceiling removal.
Why primer matters after skim coating
Primer seals the skim coat and makes the surface easier to judge before final paint. Fresh compound absorbs paint differently than older painted surfaces. If primer is skipped, the ceiling can flash, look patchy, or reveal dull and shiny areas. Primer also helps expose small defects that should be touched up before the finish coat.
Flat ceiling paint is usually the right finish because it reduces reflection. Shiny paint on a ceiling can make imperfections more visible. Even with flat paint, the surface underneath still matters. Paint does not hide bad skim coating; it often reveals it.
What a complete Mississauga quote should include
For skim coating after popcorn ceiling removal in Mississauga, compare the written scope before you compare the total price. A useful quote should say which rooms are included, whether the ceiling is painted or unpainted, what protection is included, how repairs will be handled, whether full skim coating is included, whether sanding is connected to dust control, and whether primer and flat ceiling paint are part of the work.
This matters because popcorn ceiling removal is often sold too narrowly. A removal-only number may not include the finishing stage that makes the ceiling look smooth. A full-scope number may look higher at first, but it may include protection, texture removal or surface prep, drywall repair, skim coating, sanding, primer, paint, cleanup, and return visits for touch-ups after primer reveals small flaws.
Mississauga projects can also change depending on building type. A detached home may need more square footage priced across several rooms. A condo may need elevator booking, parking notes, hallway protection, and stricter work hours. A townhome may have tight stairs, limited staging space, and ceilings broken up by bulkheads. Those details belong in the estimate because they affect how the crew protects the home and moves through the work.
Furniture is another quote factor. Empty rooms are easier to protect and finish. Furnished rooms can still be handled, but large sectionals, beds, dining sets, electronics, and built-ins need more protection and slower sequencing. If furniture cannot leave the room, say so before pricing. It is better to build that into the plan than to discover on the first morning that half the work area is blocked.
How the work usually flows
A clean project starts with room protection. Floors, walls, vents, fixtures, doorways, cabinets, counters, and traffic paths are protected before the ceiling is disturbed. Then the crew tests the texture and confirms whether scraping, controlled removal, skim coating, or a mix of methods is the right approach for that ceiling.
After the texture stage, the ceiling is inspected. This is where old seams, nail pops, paper tears, stains, fixture patches, and uneven drywall start to matter. Those defects have to be repaired before the ceiling is smoothed. Skipping this stage may save time during removal, but it usually costs the homeowner in the final look.
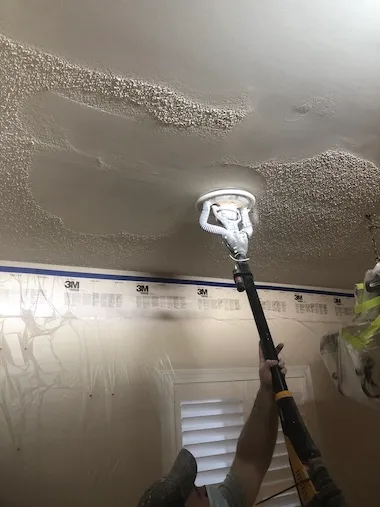
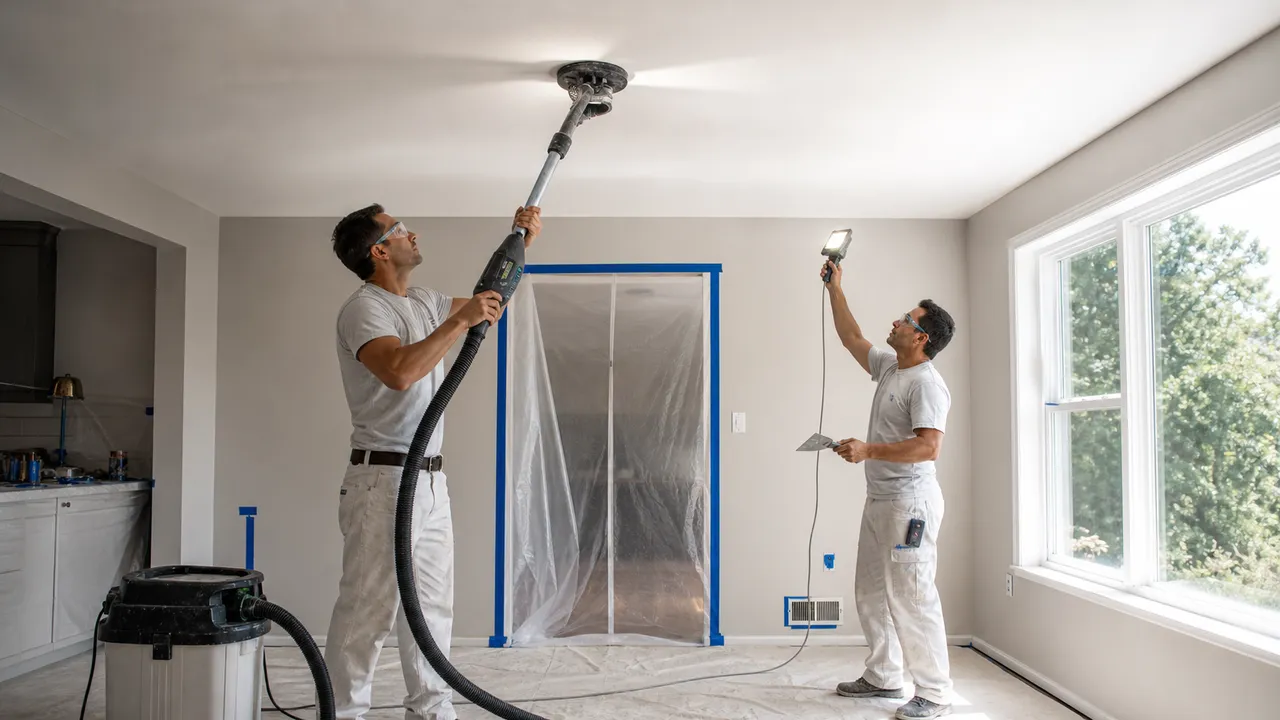
The finishing stage is where the ceiling becomes modern. Joint compound is applied in controlled passes, allowed to dry, sanded with dust control, and checked under real light. Primer then seals the surface and reveals small flaws that may need touch-up. Flat ceiling paint is usually the final step when the homeowner wants the room fully finished rather than only paint-ready.
Common mistakes to avoid
The first mistake is assuming the lowest price includes the same work. Ask what is included and what is excluded. If one quote includes only scraping and another includes skim coat, sanding, primer, paint, protection, and cleanup, those are different jobs.
The second mistake is planning other trades in the wrong order. Ceiling work should usually happen before final wall paint, trim touch-ups, flooring protection removal, deep cleaning, and staging. If pot lights, electrical changes, cabinet work, or full interior painting are part of the renovation, sequence those items before final ceiling paint whenever possible.
The third mistake is judging the ceiling too early. Raw compound can look acceptable before primer, then show sanding marks or low spots once sealed. A good crew expects to inspect after sanding and again after primer. That is not rework from failure; it is part of getting a smooth ceiling to read properly under daylight and pot lights.
What photos to send before asking for a price
Send one wide photo of every room, one close photo of the texture, and photos around lights, vents, cracks, stains, old patches, crown moulding, bulkheads, skylights, and ceiling fans. Add rough room dimensions, ceiling height, whether the home is occupied, and whether furniture can be moved out.
If you are in a condo, include building access notes, parking instructions, elevator booking requirements, and work-hour limits if you know them. If you are not sure whether the popcorn has been painted, say that too. A contractor can often flag likely painted texture from photos, but a test area is still the better confirmation.
How EPF Pro Services approaches the scope
EPF Pro Services focuses on the finished ceiling, not only the scrape. That means protection first, realistic testing, repair before finishing, dust-controlled sanding, skim coating where the ceiling needs it, primer, and flat ceiling paint when included in the scope. The goal is a ceiling that looks calm after the room is back together, not a ceiling that only looked acceptable before the final coat.
For a proper quote, send photos, room sizes, ceiling height, the building type, and any timing constraints. We can review whether the project looks straightforward, whether the ceiling is likely painted, whether condo logistics matter, whether pot lights or asbestos testing need to be addressed first, and what should be included so the quote is not comparing incomplete work to complete work.
How to compare cheap and complete quotes
A cheaper quote is not automatically wrong, but it has to be compared against the same finish target. Ask whether the number includes only texture removal or whether it includes the full path to a smooth ceiling. The difference is important because the homeowner does not live with the removal stage. They live with the ceiling after primer, paint, daylight, and pot lights show what was left behind.
A complete quote should make exclusions clear. Major water damage, active leaks, asbestos testing or abatement, electrical work, fixture supply, full wall painting, trim repair, and furniture moving may need separate lines depending on the project. Clear exclusions are not a problem. Unclear exclusions are a problem because they make two quotes look similar when they are not.
When a quote is much lower, check the finish language. Words like scrape, remove, repair, skim, sand, prime, and paint all mean different steps. If the quote says scrape only, ask what happens after scraping. If it says skim coat, ask whether that means spot skim or full ceiling skim. If it says paint-ready, ask whether primer is included or whether the ceiling is being left for another painter.
Room-by-room planning in Mississauga homes
Not every room deserves the same finish budget. Main-floor living rooms, kitchens, dining rooms, hallways, condo great rooms, and primary bedrooms usually show ceiling flaws first because they have stronger light and longer sightlines. Secondary bedrooms, closets, storage rooms, and basement utility areas may be more forgiving. A good scope can prioritize the rooms that matter most instead of treating every ceiling as identical.
If the project is part of a resale preparation, the priority is usually first-impression rooms and listing-photo rooms. If the project is part of a long-term renovation, the priority may be durability, lighting quality, and avoiding future rework. Those are different goals, and the quote should reflect which goal matters more to the homeowner.
For occupied homes, phasing can help. Some homeowners prefer one larger project so the mess is handled once. Others prefer room-by-room scheduling so they can keep bedrooms, kitchens, or work areas available. The right answer depends on family routine, condo rules, pets, furniture, and whether the home is being prepared for sale or daily living.
What affects timeline after the ceiling is opened up
The timeline can change once the texture is removed or the surface is tested. Hidden tape seams, loose drywall paper, stains, old fixture repairs, settlement cracks, or uneven board joints can add repair and drying time. That does not mean the project was poorly planned. It means the old texture was hiding conditions that could not be fully judged until the surface was exposed.
Drying time is one of the biggest schedule controls. Skim coats and repairs need time to dry before sanding and primer. Primer then gives the crew a clearer read on the surface before final paint. Trying to compress those steps can lead to shrink-back, flashing, visible patch edges, or sanding marks that only appear after the final coat.
Weather and ventilation can matter too. Humid days, poorly ventilated rooms, basements, bathrooms, and closed condo units can slow compound drying. A realistic schedule should allow for the material to cure properly instead of forcing paint onto a surface that is not ready.
Questions to ask before booking
Before booking, ask: What method are you assuming? What happens if the ceiling is painted? Is full skim coating included or only spot repair? How will you protect floors, walls, vents, fixtures, and furniture? Is sanding connected to dust control? Is primer included? Is flat ceiling paint included? What work is excluded? How many days will the room be unavailable?
Also ask what information the contractor needs from you. Good contractors usually want photos, dimensions, access notes, ceiling height, building rules, furniture limitations, and any known history such as leaks, previous patches, asbestos tests, or electrical plans. The more accurate the starting information, the cleaner the scope and schedule can be.
Bottom line
Skim coating matters because the finished ceiling is judged after primer and paint, not during scraping. If you want a smooth modern ceiling in a Mississauga home or condo, make sure the quote includes the finish work needed after removal. The clean result comes from repair, skim coating, sanding, primer, flat paint, and careful inspection under real light.
FAQ
Do you always need skim coating after popcorn ceiling removal?
Not always, but many ceilings need at least some skim coating because texture removal exposes seams, patches, paper tears, and uneven drywall.
Is skim coating included in popcorn ceiling removal quotes?
Not automatically. Some quotes include only scraping, while others include full smooth-ceiling refinishing. Ask for the scope in writing.
What is the difference between skim coating and painting?
Skim coating corrects the surface before paint. Painting only coats the surface and will not hide ridges, patch edges, or poor sanding.
Why do pot lights make skim coating more important?
Pot lights cast light across the ceiling and can reveal small ridges, sanding scratches, and patch rings after paint.
Drywall service pages and guides
Plan the Right Drywall Service Next
popcorn ceiling removal
Main service page for removal, skim coating, sanding, primer, and painting.
drywall repair
Repair service for ceiling cracks, patches, leak damage, and paint-ready surfaces.
Mississauga popcorn ceiling removal
Local ceiling removal and smooth finishing page for Mississauga homeowners.
popcorn ceiling removal cost guide
Cost factors for painted texture, access, room size, repairs, primer, and paint.
Painted popcorn: scrape or skim coat
Broader guide to removal method decisions when texture has been painted.
Taking off popcorn ceiling
Step-by-step guide to protection, testing, removal, repair, smoothing, primer, and paint.
Level 4 vs Level 5 finish after popcorn removal
Finish-level comparison for smooth ceilings under daylight and pot lights.
request a popcorn ceiling removal quote
Send photos, room sizes, ceiling height, and timing for a clearer written scope.
Field Photos
What the Work Can Look Like
Article Review
AuthorEPF Pro Services
Reviewed byEPF Pro Services
UpdatedMay 19, 2026
Plan your drywall scope
Get a drywall quote today
Share photos, room sizes, and timing. We reply the same day with Mississauga drywall availability and a clearer written scope.
Quick next step