The Complete Guide to Popcorn Ceiling Removal in 2026
2026-01-25
2026 popcorn ceiling removal guide for GTA homeowners: costs, safety, DIY vs pro, and how to get smooth ceilings.
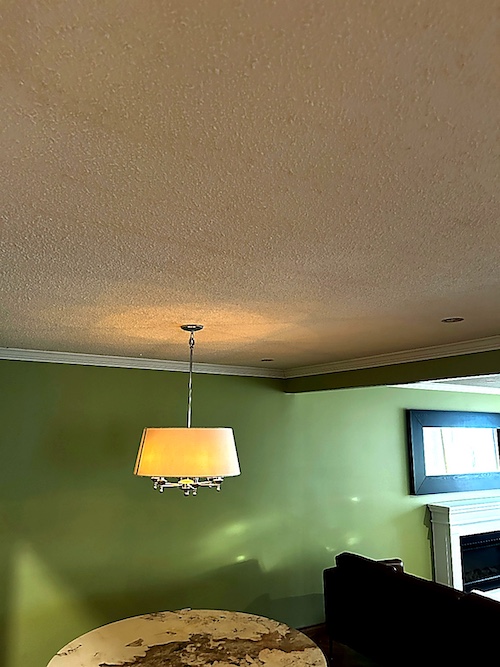
Popcorn ceilings, also known as acoustic or textured ceilings, were popular from the 1950s through the 1980s. While they served their purpose of hiding imperfections and providing soundproofing, modern homeowners increasingly view them as outdated and difficult to maintain.
If you're considering removing your popcorn ceiling, this comprehensive guide will walk you through everything you need to know.
Looking for a local team? We do popcorn ceiling removal in Burlington, Oakville, Hamilton, Mississauga, Milton, and Grimsby.
Why Remove Popcorn Ceilings?
1. Modernize Your Home
Smooth ceilings are the standard in modern homes. Removing popcorn texture instantly updates your space and can increase your home's resale value by 5-10%.
2. Health and Safety Concerns
Popcorn ceilings installed before 1980 may contain asbestos, a hazardous material linked to serious health issues. Even asbestos-free popcorn ceilings collect dust, allergens, and are difficult to clean.
3. Improved Lighting
Smooth ceilings reflect light better, making rooms appear brighter and more spacious.
4. Easier Maintenance
Unlike textured ceilings, smooth ceilings are easy to clean, paint, and repair.
Asbestos Testing: The Critical First Step
Before you start any popcorn ceiling removal project, you must test for asbestos if your home was built before 1990.
How to Test for Asbestos:
- Hire a certified inspector ($200-$800)
- Mail-in DIY test kits ($40-$100)
- Never disturb the ceiling before testing
If asbestos is present, hire certified professionals immediately. DIY removal of asbestos-containing materials is illegal in most areas and extremely dangerous.
Professional tip: At EPF Pro Services, we always recommend professional testing and removal when dealing with older homes. Your health isn't worth the risk.
Popcorn Ceiling Removal Methods
Method 1: Wet Scraping (Most Common)
Best for: Non-painted popcorn ceilings without asbestos
Process:
- Prepare the room (remove furniture, cover floors)
- Spray ceiling with water mixed with fabric softener
- Let it soak for 15-20 minutes
- Scrape with a wide drywall knife
- Sand smooth and prime
Time: 1-2 days for average bedroom Cost: $1-$3 per sq ft (DIY), $2-$4 per sq ft (professional)
Method 2: Dry Scraping with HEPA Filtration
Best for: Painted popcorn ceilings (when wet scraping won't work)
Process:
- Set up HEPA filtration system
- Carefully scrape dry texture
- Sand and feather edges
- Apply joint compound for smoothness
- Prime and paint
Time: 2-3 days for average bedroom Cost: $3-$6 per sq ft (professional recommended)
Method 3: Cover with New Drywall
Best for: Severely damaged ceilings or when asbestos is present
Process:
- Install thin drywall panels over existing ceiling
- Tape and mud seams
- Sand smooth
- Prime and paint
Time: 2-4 days Cost: $4-$7 per sq ft
DIY vs Professional Removal: What You Need to Know
DIY Popcorn Ceiling Removal
Pros:
- Cost savings on labor ($1-2 per sq ft)
- Complete control over timeline
- Satisfaction of completing project yourself
Cons:
- Extremely messy and labor-intensive
- Risk of ceiling damage requiring expensive repairs
- Health risks if proper safety equipment not used
- Time-consuming (3-5x longer than professionals)
- No warranty on work
Professional Removal
Pros:
- Expert results with smooth finish
- Proper dust containment (HEPA filtration)
- Asbestos testing and safe handling
- Complete cleanup included
- Warranty on workmanship
- 3-5x faster completion
Cons:
- Higher upfront cost
Our recommendation: Unless you have experience with ceiling work, professional removal is worth the investment. At EPF Pro Services, we've completed over 700 ceiling projects with dust-free HEPA systems and 3-year warranties.
Cost Breakdown: What to Expect
DIY Costs (500 sq ft ceiling):
- Supplies & equipment: $100-$300
- Asbestos testing: $40-$100
- Your time: 20-30 hours
- Total: $140-$400 + your labor
Professional Costs (500 sq ft ceiling):
- Basic removal: $1,000-$1,500
- Painted popcorn: $1,500-$2,500
- Asbestos removal: $3,000-$8,000
- Includes: Testing, removal, smoothing, priming
- Total: $1,000-$2,500 (asbestos-free)
Safety Equipment Required
If attempting DIY removal, you MUST have:
- N95 or P100 respirator mask
- Safety goggles
- Protective coveralls
- Drop cloths and plastic sheeting
- HEPA-filtered shop vacuum
- Proper ventilation
The Professional Removal Process
At EPF Pro Services, our popcorn ceiling removal follows this proven process:
1. Initial Inspection & Testing (Day 1)
- Comprehensive ceiling assessment
- Asbestos testing if needed
- Moisture and damage inspection
- Detailed quote with timeline
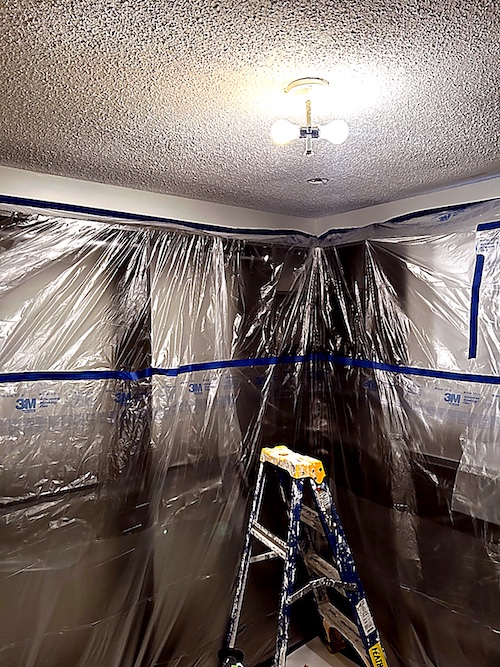
2. Room Preparation (Day 1-2)
- Complete room protection
- Furniture removal or covering
- HEPA air filtration setup
- Doorway containment
3. Removal (Day 2-3)
- Water application (if suitable)
- Careful scraping with specialized tools
- Continuous HEPA filtration
- Immediate debris removal
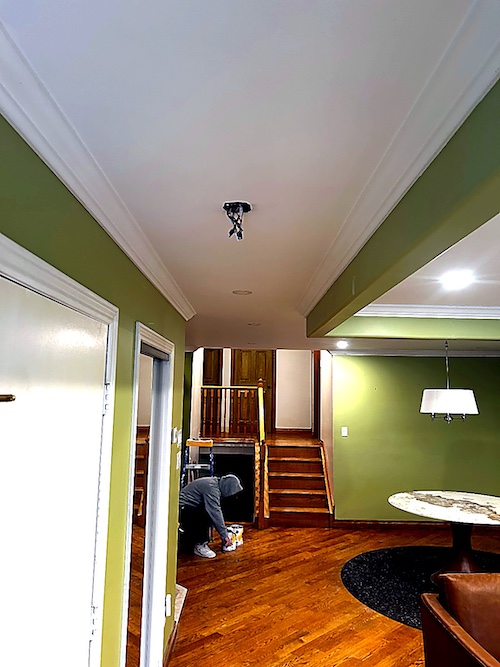
4. Smoothing & Repair (Day 3-4)
- Joint compound application
- Drywall repair if needed
- Multiple sanding passes
- Dust-free HEPA sanding
5. Finishing (Day 4-5)
- Prime with high-quality sealer
- Final inspection
- Complete cleanup
- Optional painting services
6. Final Walkthrough
- Quality check
- 3-year warranty documentation
- Maintenance tips
Common Mistakes to Avoid
1. Skipping Asbestos Testing
Never assume your ceiling is safe. Testing costs $40-$100 and could save your life.
2. Not Protecting the Room Properly
Popcorn removal creates massive amounts of dust. Without proper containment, you'll find dust throughout your entire home for months.
3. Using Wrong Tools
Garden sprayers and wide drywall knives are essential. Using the wrong tools damages drywall underneath.
4. Over-Wetting the Ceiling
Too much water damages drywall. Apply just enough to soften the texture.
5. Rushing the Process
Smooth ceilings require patience. Rushing leads to gouges, tears, and expensive repairs.
6. Ignoring Necessary Repairs
After removal, address any drywall damage before priming. Smooth ceilings reveal every imperfection.
After Removal: What's Next?
Once your popcorn ceiling is removed, you have several finishing options:
Option 1: Smooth Painted Finish (Most Popular)
- Prime with PVA primer
- Apply two coats quality ceiling paint
- Result: Clean, modern look
Option 2: Knockdown Texture
- Subtle texture that's easier to maintain than popcorn
- Hides minor imperfections
- Modern appearance
Option 3: Skip Trowel or Other Decorative Finishes
- Adds character and depth
- Requires experienced professionals
- Higher cost but unique result
Regional Considerations
Burlington, Oakville & Hamilton Area
Ontario building codes require:
- Asbestos testing for pre-1990 homes
- Proper disposal of asbestos materials
- Licensed contractors for asbestos removal
Local resources:
- City of Burlington Building Department
- Hamilton Building Permits
- Ontario Asbestos Regulations
Climate Factors
Ontario's humidity variations can affect removal:
- Best seasons: Late spring, early fall
- Avoid winter (heating affects drying)
- Summer humidity extends drying times
Frequently Asked Questions
How long does popcorn ceiling removal take?
- DIY: 3-7 days for average bedroom
- Professional: 1-3 days complete
- Whole house: 1-2 weeks professional
Can I paint over popcorn ceiling instead?
Yes, but it's a temporary solution. Painted popcorn:
- Still looks outdated
- Harder to remove later
- Doesn't address health concerns
- Collects dust and dirt
Is popcorn ceiling removal messy?
Extremely messy without proper equipment. Professional services use:
- HEPA air filtration
- Plastic containment barriers
- Dust-controlled tools
- Professional cleanup
Will removing popcorn ceiling damage my ceiling?
When done correctly, no. However:
- DIY attempts often damage drywall
- Painted popcorn increases damage risk
- Old, poorly installed drywall may need replacement
- Professional removal minimizes risk
How much does professional removal cost?
Ontario pricing (2025):
- Burlington/Oakville: $2-4 per sq ft
- Hamilton: $1.50-3.50 per sq ft
- Asbestos removal: $3-8 per sq ft
- Get accurate quote
Why Choose EPF Pro Services
With over 700 completed popcorn ceiling projects in Burlington, Oakville, and Hamilton, we're the region's trusted experts.
Our Advantages:
- Dust-Free HEPA Systems - No mess throughout home
- Asbestos Certified - Safe testing and removal
- 3-Year Warranty - Guaranteed smooth finish
- Licensed & Insured - Complete peace of mind
- Same-Day Quotes - Fast, transparent pricing
- 700+ Projects - Proven expertise
Service Areas:
Burlington | Oakville | Hamilton | Mississauga | Milton | Grimsby | Stoney Creek
Ready to Transform Your Ceilings?
Don't let outdated popcorn ceilings hold back your home's potential. Whether you're planning to sell or simply want a modern update, professional removal delivers lasting results.
Get your free quote today:
- Call: (289) 427-5478
- Email: [email protected]
- Visit: popcornceilingremovalburlington.ca
Special offer: Mention this blog post for $100 off projects over 1,000 sq ft.
Related Services
Further Reading
About the Author: Alex has over 15 years of experience in popcorn ceiling removal and drywall finishing. As project manager at EPF Pro Services, he's overseen 700+ successful ceiling transformations in the Burlington and Hamilton areas.
Related local pages
Popcorn ceiling removal service — Main popcorn ceiling removal service page for the GTA.
Burlington popcorn ceiling removal — Local Burlington popcorn ceiling removal projects.
Oakville popcorn ceiling removal — Smooth ceilings and Level 5 finishes for Oakville homes.
Hamilton popcorn ceiling removal — Dust-controlled popcorn removal across Hamilton.
Mississauga popcorn ceiling removal — City-wide popcorn ceiling removal service for Mississauga.
Milton popcorn ceiling removal — Popcorn removal and skim coating in Milton.
Grimsby popcorn ceiling removal — Local Grimsby ceiling smoothing and refinishing.
Field photos
Inspiration for your project
Mississauga ceiling terminology to know
Skim these phrases before you call so conversations with our crew stay clear and focused.
- popcorn ceiling removal Burlington
- popcorn ceiling removal Oakville
- popcorn ceiling removal Hamilton
- popcorn ceiling removal Mississauga
- popcorn ceiling removal Milton
- popcorn ceiling removal Grimsby
- popcorn ceiling removal cost
- popcorn ceiling removal 2026
Ready to plan your ceilings?
Get a popcorn ceiling quote today
Share photos, ceiling heights, and timing. We reply the same day with Mississauga, Oakville, and GTA availability.
• HEPA dust control and Level 5 skim finishing
• Pot-light coordination and interior painting add-ons
• Flexible scheduling for condos and single-family homes