Mistakes to Avoid When Patching Drywall
2026-03-31
Learn the most common drywall patching mistakes, from poor prep and heavy compound to weak feathering, rushed drying, and sanding errors that leave repairs visible.
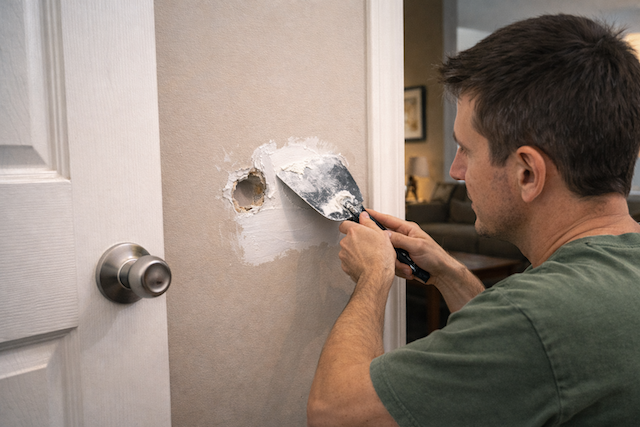
Patching drywall sounds like one of those jobs that should be easy once you buy a putty knife and a tub of compound. Then the wall gets painted, light hits it from the side, and the repair still shows from across the room. That is when homeowners realize drywall patching is not really about filling damage. It is about rebuilding the surface so the repair disappears after primer and paint.
If you are searching for mistakes to avoid when patching drywall, you are already asking the right question. Most bad repairs are not caused by one dramatic mistake. They come from a series of small decisions that seem harmless in the moment but add up to ridges, flashing, shrinkage, low spots, rough texture, or obvious patch lines later.
If your goal is a repair that actually disappears instead of one that still catches your eye every time you walk past it, compare your plan against our professional drywall repair process for holes, cracks, cut-outs, and seamless wall finishing.
Why drywall patches go wrong in the first place
A lot of DIY patches fail because the person doing the work is thinking about the damage, not the finished wall. Covering the opening feels like the hard part, but visually that is only the beginning. The real challenge is blending the repaired area into the surrounding drywall so the surface reads flat under natural light, pot lights, hallway lighting, and fresh paint.
That is why drywall repair mistakes show up so clearly in living rooms, stairwells, hallways, kitchens, and bedrooms with larger windows. You may not notice a rough patch at first while the mud is still drying, but once the wall gets primed and painted, the reflection pattern changes and the patch becomes obvious.
Poor preparation creates adhesion problems. The wrong repair method creates movement or cracking. Too much joint compound creates buildup. Weak feathering leaves a shape around the patch. Rushing drying time tears the surface. Aggressive sanding creates dips. Skipping primer causes flashing. Ignoring paint sheen or texture makes the repaired area stand out even more.
Quick checklist before you patch drywall
- Know how big the damage really is
- Make sure the drywall around the area is solid and dry
- Choose a patch method that matches the size of the opening
- Plan for multiple thin coats instead of one heavy pass
- Give each coat enough drying time
- Sand to blend, not to dig
- Prime before paint
- Check the wall in side light before calling it done
Mistake 1: Poor surface preparation
One of the most common patching drywall mistakes happens before the repair even starts. Homeowners often apply compound over dusty drywall, torn paper, loose paint, cracked edges, or soft material around the opening because they want to move quickly into the filling stage.
That usually creates a weak repair. If the area around the patch is unstable, the compound does not have a good base to bond to. Even if it looks acceptable for a few days, the repair can crack, chip, bubble, or print through later once the wall is painted and used normally.
Good surface prep usually means cutting back loose paper, trimming damaged edges to something sound, cleaning off sanding dust, and making sure there is no hidden moisture issue. If the drywall feels soft or crumbly, or if the paper face is heavily torn, the fix may need more than just mud on the surface.
This matters even more after plumbing leaks, old anchor damage, repeated patch attempts, and trade cut-outs. In those cases the visible hole is often only part of the problem. The surrounding drywall may already be compromised.
Mistake 2: Using the wrong patching method for the size of the damage
Not every drywall repair should be handled with the same method. Small nail pops, screw holes, and shallow dents usually need a light fill and careful sanding. Medium-sized holes may need mesh, patch material, or backing support. Larger damaged sections often need cut-out replacement and a wider finish process.
A lot of homeowners make the mistake of treating every repair like a surface fill. That works for tiny damage, but once the hole is bigger, broken at the edges, or missing support behind it, the patch needs real structure before it can ever look smooth.
Trying to fill a larger opening with compound alone often leads to sagging, shrinkage, cracking, and a repair that sits proud of the wall. On the other hand, overcomplicating a tiny patch can create more finishing footprint than the original damage itself.
The method has to match the wall condition, the size of the hole, and how clean the final result needs to look.
If you are not sure where a simple patch ends and a rebuild begins, our guide on repairing large drywall holes properly is the best follow-up before you start cutting, taping, or filling.
Mistake 3: Applying too much joint compound in one coat
This is one of the biggest drywall repair mistakes homeowners make because it feels efficient in the moment. The thinking is simple: if the area needs to be flat, why not load on enough mud to make it flat immediately?
The problem is that heavy compound is harder to control, slower to dry, more likely to shrink, and much more likely to create a hump around the patch. Once that hump is there, the repair often turns into a sanding fight. Instead of building a clean surface, you are now trying to grind your way back to flatness.
Thicker coats also hold moisture longer, especially in basements, cooler rooms, and occupied homes where airflow is limited. That often causes false confidence, because the patch may feel dry on the outside while still being soft underneath.
A better finish usually comes from thinner, controlled passes that gradually build the surface. It takes more patience, but the repair stays flatter and the sanding stage becomes much more manageable.
Mistake 4: Weak feathering that leaves a visible patch outline
Feathering drywall patch repairs is where a lot of decent-looking work stops being convincing. If the compound ends too abruptly, you create a shape around the repair. That shape may not be obvious while the wall is dull and unfinished, but it shows quickly once the surface is primed and painted.
This is especially noticeable in hallways, long walls, stairwells, dining rooms, and living rooms where light skims across the drywall. The eye catches even small changes in reflection. A narrow patch often creates a square or circular outline that keeps pulling attention toward the repaired area.
Homeowners often keep the repair too tight because they are trying to save time or avoid sanding more wall than necessary. The trouble is that good feathering usually needs more width than people expect. You are not just covering damage. You are tapering the wall back to itself so the transition disappears.
When feathering is too narrow, the repair may feel fine under the knife but still read as a raised island once painted.
Mistake 5: Not checking the patch in real lighting
A drywall patch can look perfectly fine straight on and still fail badly in side light. That is because patching problems are often reflection problems. A wall can be technically filled and sanded, but if the light breaks differently over the repair, you will still see it.
This is one reason high-visibility repairs are harder than homeowners expect. A patch in a closet or utility room can be acceptable at a lower finish standard. A patch on a hallway wall with a window at the end of it is much less forgiving.
Checking the repair under room lighting, daylight, and from an angle before you prime is one of the best ways to catch ridges and low spots early. If you only look at the patch head-on, you miss the very thing that will make it obvious later.
Mistake 6: Rushing drywall patch drying time
Drywall patch drying time is where impatience starts creating avoidable rework. Joint compound needs enough time to dry fully between coats. That seems basic, but many DIY repairs go sideways because the next step starts too early.
If you sand before the compound is fully dry, the repair can tear, gum up, or smear instead of powdering cleanly. If you recoat too soon, you can trap moisture under the next layer and make the patch slower and less predictable to finish.
Drying time also changes depending on thickness, humidity, airflow, temperature, and whether the wall is in a basement or other cooler area. That is why one patch may be ready quickly while another still needs more time even though they were coated the same day.
Rushing usually adds time, not saves it. It creates soft spots, edge damage, and shrink-back that forces more coats later.
Mistake 7: Sanding too early or too aggressively
Sanding drywall patch areas should refine the finish, not destroy it. Yet this is where many DIY repairs get noticeably worse. A homeowner sees a high spot, pushes harder, and suddenly the patch edge is gouged, the tape is exposed, or a shallow dip has been created around the repair.
Over-sanding often happens because too much compound was applied earlier. Instead of recognizing that the buildup was the issue, people try to solve it with force. The result is a patch that becomes wider, rougher, and more uneven with every attempt to fix it.
Another common mistake is using grit that is too coarse. Aggressive paper can scar the surrounding drywall surface and make the repair area even harder to blend after paint.
Good sanding drywall patch work is controlled and patient. The goal is to knock down edges, soften transitions, and preserve a flat overall plane. If the patch keeps turning into a crater or exposing the repair underneath, the sanding has already gone too far.
Mistake 8: Leaving dust behind before primer and paint
Drywall dust is not just messy. It also affects adhesion and finish quality. A patch that is technically smooth can still end up with poor primer bonding or a rough paint feel if the surface is not cleaned properly before the next step.
Homeowners sometimes wipe too aggressively and damage the patch, or skip cleanup almost entirely because the wall looks clean enough. Then primer goes over dust, the surface dries inconsistently, and the repair still looks off.
The cleaner the transition between sanding, priming, and painting, the easier it is to judge the wall honestly. Dust is one more way a patch can look finished too early when it is not.
Mistake 9: Skipping primer before paint
This is one of the easiest ways to leave a visible repair, even if the patch shape itself is not terrible. Fresh compound absorbs paint differently from the surrounding wall. Without primer, patched areas often dry duller, shinier, or blotchier than the rest of the surface.
That uneven absorption creates flashing. Under daylight or room lighting, the repair may show as a separate patch even though the wall color technically matches. Homeowners often think the problem is the paint when the real issue is that the patch was never sealed properly first.
Primer also gives you one more chance to inspect the wall honestly. Once the surface is sealed, ridges, pinholes, and low spots often become easier to spot. That is why primer should be treated as part of the repair process, not just the start of painting.
Mistake 10: Ignoring wall texture and paint sheen
A patch that is flat enough on a smooth matte wall may still stand out badly on a textured surface or on paint with more sheen. Texture matching is part of the repair, not an optional afterthought.
This becomes obvious on orange peel, older rolled texture, patched ceilings, and walls that have been repainted multiple times. Even if the patch is structurally fine, the surrounding texture pattern or the sheen difference can make it read as a separate surface.
The more visible the room, the more this matters. Entryways, kitchens, stairwells, main-floor living rooms, and ceilings are all less forgiving than utility spaces.
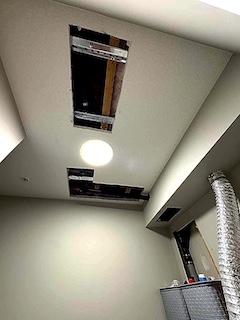
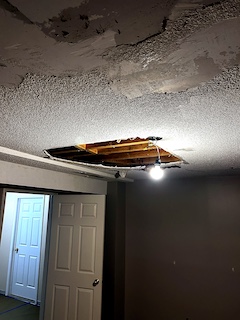
Mistake 11: Treating ceiling patches like wall patches
Ceiling repairs are usually less forgiving than wall repairs. Gravity, light angle, and room position all work against you. A patch that might pass on a wall often stands out on a ceiling because people see the broad flat surface all at once and light reflects across it differently.
This is especially true after old light fixtures, leak repairs, vent changes, and trade cut-outs. Ceiling patches often need wider finish work than homeowners expect, and they are much more likely to show if the sanding or feathering is only average.
That is one reason many DIY drywall repair mistakes are discovered overhead first. Once a ceiling is painted, the eye catches every variation.
Mistake 12: Repeating the same cosmetic fix instead of solving the real repair problem
Some patches are simple. Many are not. A crack that keeps returning, a wall opening from plumbing or electrical work, repeated repairs in the same spot, or soft drywall after a leak usually means there is more going on than one shallow fill can solve.
That is where homeowners often lose the most time. They keep patching symptoms rather than fixing the repair properly. The wall may need backing support, cut-out replacement, wider taping, moisture-related repair steps, or a better finish process before it can truly look right again.
When the patch keeps reappearing, cracking back out, or showing through paint, the final coat is usually not the real issue. The approach underneath is.
When DIY drywall patching still makes sense
DIY patching can still be reasonable for tiny screw holes, isolated dents, small scuffs, and low-visibility wall wear. If you are filling a few picture-hook holes before repainting a bedroom, it often makes sense to do that yourself as long as the surrounding drywall is stable and your expectation is practical.
The risk rises when the damage is larger, the wall has texture, the room has strong natural light, the patch is at eye level in a finished space, or the repair needs to disappear seamlessly because the room is already in good condition.
That is the real dividing line. DIY works best when the cost of being slightly imperfect is low. Once the room is visible, updated, and expected to look polished, the finish standard becomes much more demanding.
When it is worth calling a professional
Calling a professional usually makes sense when the patch is in a high-visibility room, involves more than one damaged area, follows water damage, came from plumbing or electrical work, or needs texture matching. It is also worth it when you are already on your second attempt and the wall still looks wrong.
Professional drywall repair adds the most value where finish quality matters. That means cleaner prep, better backing when needed, more controlled compound work, wider feathering, better sanding discipline, more accurate texture matching, and a repair plan built around the final painted surface rather than the quick patch itself.
For homeowners in Ontario and the GTA, that usually means fewer visible patch lines, less repeated work, less dust-filled trial and error, and a wall that looks calm again instead of obviously repaired.
What a professional repair solves that DIY often misses
- Better judgment on patch versus cut-out replacement
- Cleaner prep before compound goes on the wall
- Thinner, flatter coats with less buildup
- Wider feathering in visible rooms
- Surface checks under real lighting before paint
- Texture and sheen matching that blends into the room
- A repair process built around the final look, not just covering damage
Final thoughts
The biggest mistakes to avoid when patching drywall are rarely dramatic. They are the ordinary rushed choices that happen at each stage: weak prep, the wrong repair method, too much compound, poor feathering, not enough drying time, rough sanding, skipped primer, ignored texture, and finishing that never really returns the wall to a single flat surface.
If the goal is simply to cover a hole, almost any patch can look acceptable for a short time. If the goal is a repair that disappears after paint, the process has to be tighter from start to finish. That is the difference between a patched wall and a repaired wall.
If you want a cleaner result without visible patch marks, see our drywall repair services for cracks, holes, trade cut-outs, water damage, and seamless patch repair across the GTA.
Related local pages
How to repair large drywall holes properly — A useful follow-up when the damage is too big for a simple patching approach.
DIY drywall repair vs hiring a professional — Compare where a homeowner patch makes sense and where finish quality matters more.
FAQ
Why does my drywall patch still show after painting?
Visible patches usually come from heavy compound, weak feathering, poor sanding, skipped primer, or a repair method that did not match the size of the damage.
How long should drywall patch compound dry before sanding?
It depends on thickness, humidity, temperature, and airflow. Thin coats dry faster, but sanding too early often tears or smears the repair and makes the patch harder to finish cleanly.
Do I need primer over a drywall patch before paint?
Yes. Primer helps patched areas absorb paint more evenly and reduces flashing, dull spots, and visible repair outlines after the wall is painted.
What is the most common mistake when patching drywall?
One of the most common mistakes is trying to solve the repair in one heavy coat of compound. That usually creates buildup, longer drying time, more sanding, and a patch that still shows afterward.
When should I call a professional for drywall repair?
It usually makes sense to call a pro for larger holes, visible rooms, textured walls, repeated cracks, water damage, or any repair that needs to disappear cleanly after paint.
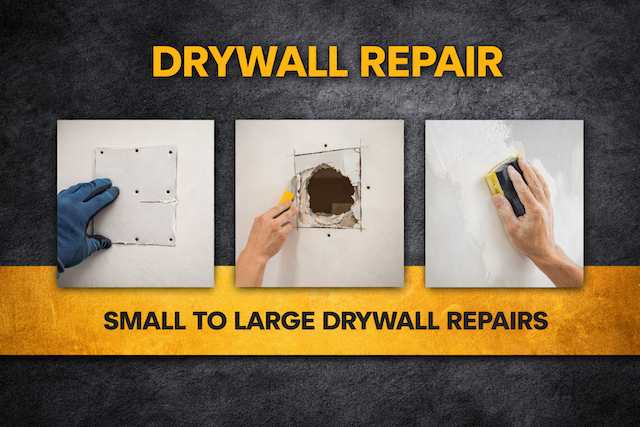
Field photos
Inspiration for your project
Drywall terms this page covers
Useful terms to compare scopes, finish levels, and scheduling before you book.
- mistakes to avoid when patching drywall
- patching drywall mistakes
- drywall patching tips
- drywall repair mistakes
- applying joint compound
- feathering drywall patch
- sanding drywall patch
- drywall patch drying time
- professional drywall repair
Plan your drywall scope
Get a drywall quote today
Share photos, room sizes, and timing. We reply the same day with GTA drywall availability and a clearer written scope.
• Clear finish-level scope and drywall sequencing
• Basements, ceilings, condos, and commercial buildouts
• Flexible scheduling for occupied homes, condos, and active sites
Quick next step
Send photos and room sizes through the main quote page, or call for a same-day reply.
Keeping the form on the main quote page helps this article stay lighter and faster.