How to Prepare Your Home for Popcorn Ceiling Removal
2026-04-06
Practical homeowner guide to popcorn ceiling removal preparation, including room setup, painted texture checks, dust control, cleanup planning, and what happens after removal.
Preparing properly for popcorn ceiling removal changes the entire job. The room stays easier to protect, the work sequence becomes easier to manage, and the final finish usually turns out better because the crew can focus on the ceiling instead of fighting the setup.
A lot of homeowners think preparation means moving furniture and laying down a drop sheet. In reality, effective prep is broader than that. You need to think about dust travel, ceiling condition, what can stay in the room, what should leave the room, whether the texture has been painted, and what happens after the texture comes down.
If you want to understand the full ceiling-removal process from prep through smooth finishing, start with our popcorn ceiling removal page.
The rest of this guide focuses on how homeowners can get the space ready before the crew arrives so the work stays cleaner, safer, and more predictable.
Why preparation matters before popcorn ceiling removal
Ceiling work is demanding because it happens overhead and affects the entire room at once. If the room is not ready, every stage becomes harder. Dust control is weaker, ladder placement is more awkward, surface protection becomes less reliable, and the finish stage slows down because the crew cannot move through the space efficiently.
Preparation also affects the quality of the finished ceiling. Once the old texture is disturbed, the surface often needs repairs, smoothing, sanding, final prep, and paint before it looks right again. The easier it is to access the room and control the environment, the easier it is to complete those stages properly.
Good preparation helps with all of the following:
- Dust containment and easier cleanup
- Faster and safer ladder access
- Better protection for floors, trim, and furnishings
- Cleaner repair and skim-coat work after removal
- Fewer delays caused by room clutter and avoidable setup issues
Vacant rooms and furnished rooms require different planning
An empty room is always easier. A furnished room can still be done, but it requires more thoughtful staging. That is especially true when the room still needs to stay somewhat functional during the project.
1. Vacant rooms
Vacant rooms give the crew open access to the full floor and perimeter. That makes it easier to protect the floor, work the edges of the ceiling, and move from removal to repairs without re-staging the room every time the work changes phase.
Even in an empty room, though, perimeter storage can still create problems. Boxes, spare furniture, renovation supplies, and loose materials should come out if they block corners, vents, closets, or trim lines.
2. Furnished rooms
In furnished rooms, the goal is to remove anything that creates dust risk, access problems, or cleanup headaches later. Smaller furniture, electronics, decor, and fragile items should come out first. Larger pieces may be able to stay only if they do not interfere with ceiling access and can be protected properly.
A useful rule is this: if something is valuable, delicate, awkwardly shaped, or easy to move now, remove it instead of counting on plastic protection to solve everything later.
What homeowners should remove before the crew arrives
Before workday one, remove or relocate the items that most often slow setup down or get unnecessarily dusty:
- Wall decor, mirrors, clocks, and hanging accessories
- Fragile decor, ceramics, glass items, and sentimental pieces
- TVs, speakers, computers, printers, gaming systems, and other electronics
- Window coverings if they interfere with ceiling-edge access
- Smaller movable furniture such as stools, side tables, benches, lamps, and accent chairs
- Valuables, paperwork, medication, and personal items
- Pet beds, bowls, litter boxes, toys, and cages
If there are larger items you are unsure about, evaluate them before the work starts. It is much easier to make that decision in advance than after floor protection and containment are already in place.
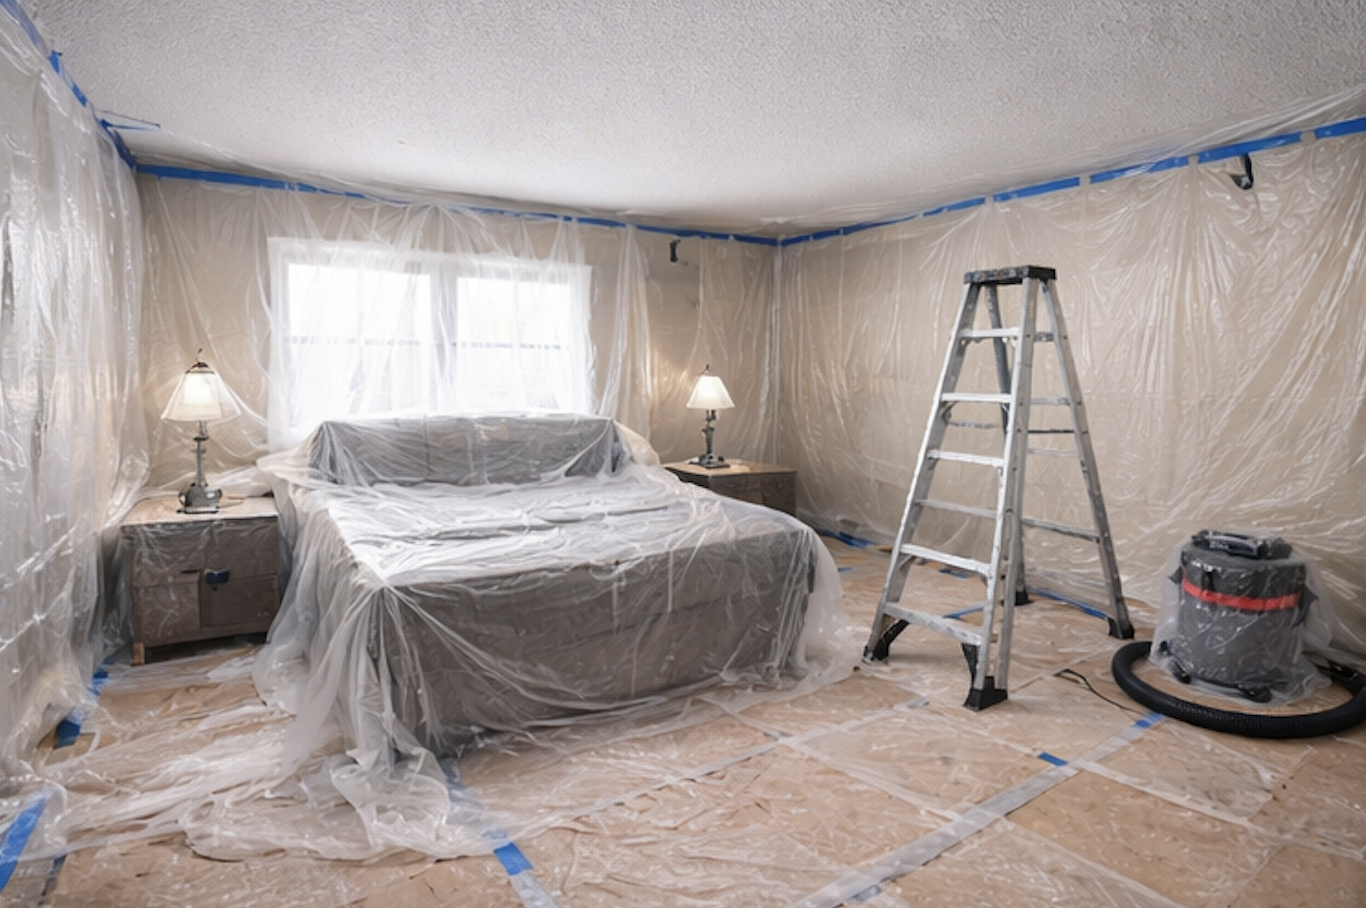
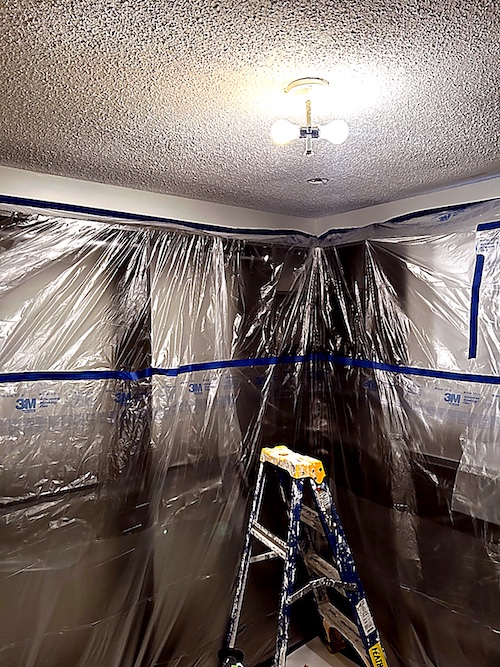
How to protect floors, walls, vents, and fixtures
Protection works best when it is planned as a system. Floors need one type of coverage. Vents need sealing. Fixtures may need removal or masking. Nearby rooms may need isolation. A single sheet of plastic over the room is not a real containment strategy.
Hardwood floors usually need more stable protection because ladders and foot traffic shift light coverings. Tile still needs coverage to keep residue out of joints and edges. Carpet benefits from strong edge sealing because fine dust settles into it easily. Walls and trim near the ceiling line may also need masking if the room has fresh paint, wallpaper, mouldings, or built-ins.
Important prep points usually include:
- Protecting or removing ceiling-mounted lights
- Discussing pot lights before work starts
- Protecting smoke detectors if they sit in the active work area
- Sealing HVAC vents
- Isolating or removing ceiling fans that block access
- Controlling adjacent openings if the room is connected to other finished spaces
Check the ceiling condition before removal begins
Ceiling condition affects preparation just as much as room condition. Before work starts, look for stains, previous patch marks, cracks, sagging sections, nail pops, loose seams, or areas that appear harder or shinier than the rest. Those details often point to prior paint, water damage, or older repairs that will change the finish plan once the texture is gone.
It also helps to identify bulkheads, skylights, crown edges, vaulted sections, and plaster transitions. These details often add time and hand-finish work even if the room itself is not especially large.
Painted vs unpainted popcorn ceiling preparation
This is one of the biggest decision points in the whole project. Unpainted popcorn can sometimes be removed more predictably. Painted popcorn typically changes the process because the paint seals the texture and makes removal less forgiving. That often leads to more repair work and a heavier skim-coat scope.
For homeowners, that means preparation should include realistic expectations. A painted ceiling may need more time, more drying between stages, and more finish work than an unpainted one. That affects how long the room is out of service and what level of disruption to expect.
Older ceilings and material uncertainty
Older ceilings should never be treated casually when the material history is unclear. The age of the home, past renovation layers, and unknown coatings can all affect how the project should be approached. If there is uncertainty about the material, that should be addressed before the ceiling is disturbed.
Preparation is partly about protection and partly about informed decisions. A room can be physically ready for work and still not be ready from a materials standpoint if the ceiling history has not been considered.
Plan access, room use, and workday flow
A ceiling project also needs a basic logistics plan. The crew needs a route in, somewhere to stage tools and floor protection, and a clear understanding of whether the room or nearby spaces need to be usable again the same day. If other trades are involved, especially electricians, the sequence should be coordinated before work begins.
These details may sound minor, but they affect how cleanly and efficiently the job can move once containment is in place.
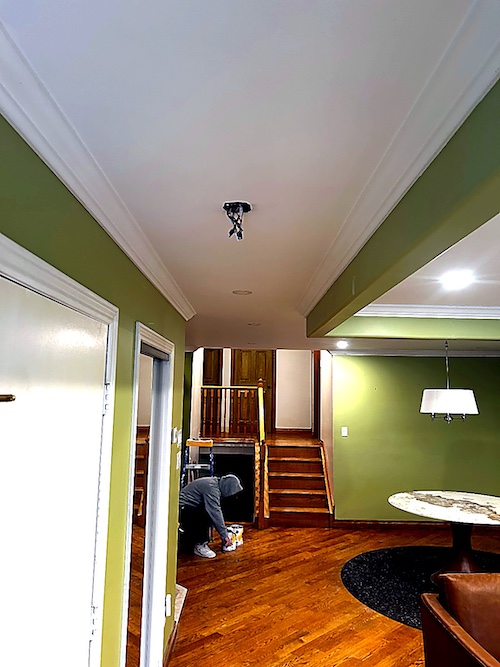
What happens after the popcorn is removed
Many homeowners assume removal is the main event. It usually is not. The real quality of the project comes from what happens next.
A normal finish sequence often looks like this:
- Remove or resurface the old texture
- Repair exposed damage or uneven areas
- Apply smoothing work to flatten the field
- Sand and inspect the surface under working light
- Prime the ceiling
- Apply flat finish paint and complete cleanup
That is why preparation should account for the full process, not just the first day. Cleanup is not only about collecting debris. It also means managing dust during sanding and making sure the room is actually ready to use again after the finish stages are complete.
Common preparation mistakes homeowners make
- Leaving too much furniture in the room
- Forgetting to remove fragile electronics and decor
- Assuming scraping is the whole job
- Not checking whether the texture appears painted
- Leaving vents open or ignoring adjacent rooms
- Underestimating how much repairs affect the final timeline
Homeowner checklist before popcorn ceiling removal day
- Remove decor, electronics, valuables, and fragile items
- Create as much open floor space as possible
- Check the ceiling for paint, stains, cracks, or previous repairs
- Decide what larger furniture can stay and what should go
- Keep pets and their belongings out of the work zone
- Confirm entry access and room-use expectations
- Review the finish plan for repairs, smoothing, final prep, and paint
Set expectations for cleanup after popcorn ceiling removal
One reason homeowners search for popcorn ceiling removal preparation is that they are trying to predict the mess, not only the method. That makes cleanup part of the intent behind the page, not a separate topic. Good preparation reduces cleanup problems because it improves containment, keeps the access route controlled, and prevents the room from becoming overfilled with things that should have been removed before work started.
It also helps to understand that visible debris and final cleanup are not the same thing. A room can look cleaner at the end of removal day and still need more controlled cleanup after sanding, surface checks, and final prep before paint. Thinking about that in advance gives homeowners a more realistic picture of what the full process involves.
How ceiling repairs after popcorn removal affect timing
Another major reason these preparation pages matter is that texture removal often reveals more ceiling work than homeowners expected. Cracks, patches, torn paper, uneven seams, and old repairs are common once the surface texture is gone. Those problems are not unusual. They are simply part of why popcorn ceiling removal preparation has to include finish expectations as well as room setup.
That is also why a homeowner checklist should never stop at moving furniture and covering floors. It should also prepare the homeowner for the broader sequence of repairs, smoothing work, sanding, final prep, and flat paint that usually follows the removal stage. Once you understand that chain, the preparation decisions become much clearer and the project feels far less unpredictable.
Final thought
The cleanest popcorn ceiling projects start with better preparation, not better scrambling on day one. If the room is ready, the crew can protect it properly, work the ceiling more efficiently, and spend more attention on the part that actually matters most: the quality of the finished ceiling.
FAQ
Do I need to empty the room completely before popcorn ceiling removal?
Not always, but the more open the room is, the easier it is to protect and finish cleanly. Vacant rooms are simpler than furnished ones.
Can furniture stay in the room during popcorn ceiling removal?
Some larger items can stay if they do not block access and can be protected properly, but electronics, fragile items, and smaller furniture should usually be removed.
What if the popcorn ceiling has already been painted?
Painted texture usually requires a more careful and repair-heavy process than unpainted popcorn. It often adds more smoothing work and extra finishing work.
What happens after the old texture is removed?
The ceiling often still needs repairs, smoothing, sanding, final prep, and flat finish paint before it is truly ready under normal lighting.
How messy is popcorn ceiling removal?
It is a messy overhead project by nature, but proper containment, floor protection, vent sealing, and controlled sanding make a major difference in how clean the room stays.
Why does preparation affect the final finish?
Because easier access, better protection, and stronger containment give the crew a cleaner environment for repairs, smoothing, sanding, and paint-ready finishing after the texture comes off.
Field photos
Inspiration for your project
Popcorn ceiling terms this page covers
Useful terms to compare removal, skim coating, and finish scope before you book.
- how to prepare for popcorn ceiling removal
- prepare home for popcorn ceiling removal
- popcorn ceiling removal preparation
- prepare room for popcorn ceiling removal
- painted popcorn ceiling prep
- cleanup after popcorn ceiling removal
- ceiling repairs after popcorn removal
- popcorn ceiling removal checklist
- vacant vs furnished room popcorn ceiling removal
Ready to plan your ceilings?
Get a popcorn ceiling quote today
Share photos, ceiling heights, and timing. We reply the same day with Mississauga, Oakville, and GTA availability.
• HEPA dust control and Level 5 skim finishing
• Pot-light coordination and interior painting add-ons
• Flexible scheduling for condos and single-family homes
Quick next step
Send photos and room sizes through the main quote page, or call for a same-day reply.
Keeping the form on the main quote page helps this article stay lighter and faster.