Renovation Triggers: Drywall Installation After Drop Ceilings, Open Walls, and New Lighting
2026-02-19
Planning renovation work that affects ceilings or walls? Here is what to expect for drywall reinstall timelines, pricing, and patch-vs-replace decisions.
Many drywall projects do not start as drywall projects. They start when homeowners remove old drop ceilings, open walls for electrical or plumbing upgrades, or add modern lighting and discover the existing board cannot be saved cleanly. This guide covers the most common renovation triggers and what a proper reinstall should include.
Drywall installation after removing a drop ceiling: what to expect (cost + timeline)
Once a suspended drop ceiling comes down, the structure above often shows uneven framing, old mechanical lines, and mixed patch history. At that point, new drywall installation is usually cleaner and faster than trying to rescue fragmented surfaces.
Typical sequence is: site prep and protection, framing checks, full board install, taping, multiple compound coats, sanding, and final primer-ready inspection. Small basement zones may finish in 2-4 days. Larger open areas usually run 4-7 days depending on finish level and drying conditions.
Cost depends on square footage, ceiling height, access, number of bulkheads, and whether insulation, electrical, or framing corrections are bundled into the same scope. The key is to price the whole assembly, not only the board install.
Opening walls for electrical/plumbing: how drywall is reinstalled properly
When electricians or plumbers open walls, the reinstallation quality determines whether the repair disappears or stays visible forever. Clean drywall restoration starts with square cutouts, secure backing, and matching board thickness before any compound is applied.
Proper reinstallation includes fastening to solid supports, tape reinforcement at all seams, feathered compound passes, and controlled sanding under strong light checks. Skipping backing or overfilling seams is the main reason repaired walls telegraph lines after paint.
If multiple trade openings are close together, replacing a larger panel section is often better than making many small patches. Fewer seams means fewer failure points and a flatter finish.
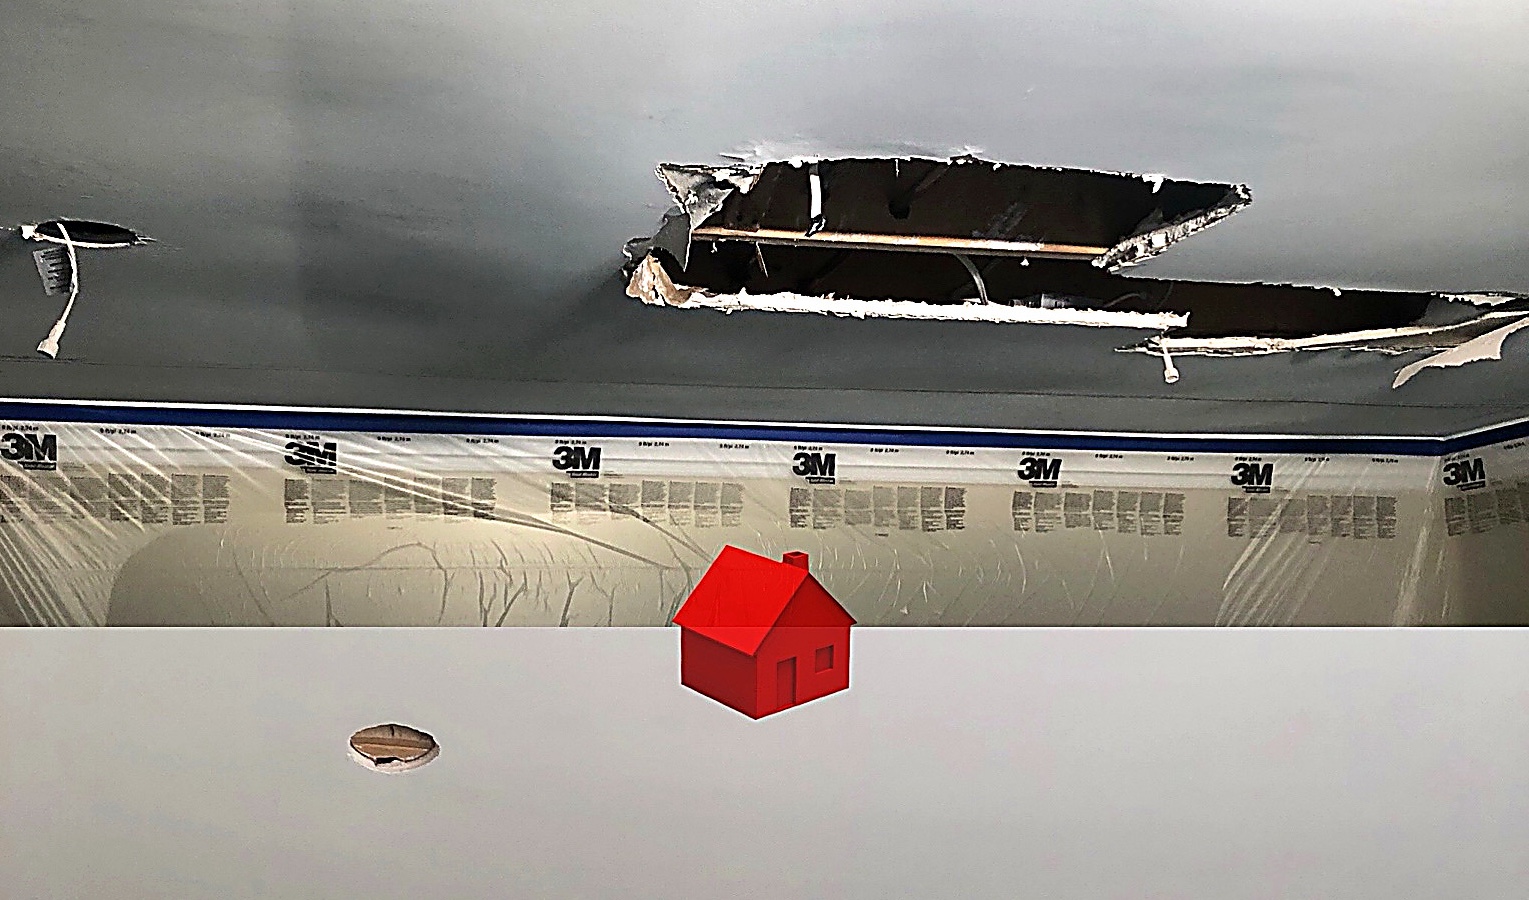
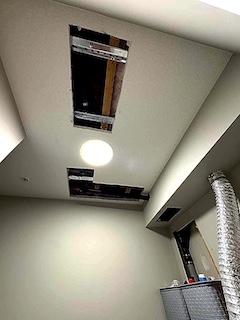
Pot light and lighting cutouts: when you need drywall replacement vs patching
Lighting upgrades can leave torn edges, oversized holes, or swiss-cheese ceilings from old fixture layouts. Whether you patch or replace depends on hole count, spacing, and the finish standard you want.
Patching is usually fine when openings are limited and evenly spaced with stable surrounding drywall. Replacement is usually better when holes overlap, previous repairs are weak, or the ceiling is already wavy and will be viewed in direct side lighting.
If you are moving from one fixture to many pot lights, plan drywall and electrical sequencing together. This avoids duplicate labor and keeps final cutouts aligned with the finished plane.
How to avoid delays and rework
Confirm finish level in writing before work starts. For modern smooth walls and ceilings, Level 5 is often the safest target, especially where daylight or pot lights expose surface flaws.
Ask for dust-control steps, dry-time assumptions, and a clear handoff point for primer and paint. Most timeline problems come from rushed drying or unclear trade sequencing, not from the board install itself.
Bottom line
Drop ceiling removal, opened service walls, and lighting upgrades are all strong signals that professional drywall installation may be the right next step. Done properly, the result is a stable surface that stays flat, paints evenly, and supports the rest of your renovation without recurring touchups.
Related local pages
Drywall installation service — See our full process for board install, finishing, and paint-ready surfaces.
Field photos
Inspiration for your project

Drywall terms this page covers
Useful terms to compare scopes, finish levels, and scheduling before you book.
- drywall installation after drop ceiling removal
- drywall reinstall after electrical plumbing work
- pot light cutout drywall replacement vs patching
- drywall installation cost and timeline
- Level 5 drywall finish for renovations
Plan your drywall scope
Get a drywall quote today
Share photos, room sizes, and timing. We reply the same day with GTA drywall availability and a clearer written scope.
• Clear finish-level scope and drywall sequencing
• Basements, ceilings, condos, and commercial buildouts
• Flexible scheduling for occupied homes, condos, and active sites
Quick next step
Send photos and room sizes through the main quote page, or call for a same-day reply.
Keeping the form on the main quote page helps this article stay lighter and faster.